One of the biggest game-changers in food photography is learning how to shoot in manual mode. This post talks about the different exposure settings and how to adjust them so you can take more control over the exposure of your food photography images.
This post contains affiliate links. Read the affiliate disclosure.

How To Shoot In Manual Mode
What Does Manual Mode Mean?
Manual mode means that you control of the exposure of your images. You have to manually set your camera to ‘manual mode’ in order to access the following exposure settings:
- APERTURE
- SHUTTER SPEED
- ISO
Most people start off using their DSLR or mirrorless camera in AUTO mode. This basically means that the camera decides the exposure settings for you. Although this may seem convenient in the beginning, the problem with AUTO mode is that your camera is making all the decisions about the exposure for your images and unfortunately, it’s not always right. Your camera is an amazing tool, but it won’t have your vision and it won’t always make the best decisions for your images.
Other People’s Camera Settings Don’t Matter
When it comes to adjusting your camera settings, you may be curious to look at what camera settings other people are using to capture their images. In the examples below, I provide the camera settings that I used to demonstrate how aperture, shutter speed and aperture work.
You can use my settings as a guide, but it’s important to note that you can’t necessarily use the exact same settings for your images. I chose the settings that worked best for my lighting situation during that photo shoot. So, camera settings will vary from person to person, simply because lighting varies from shoot to shoot.
Manual Mode: Aperture
What Is Aperture?
The aperture is the size of the hole in your lens. For this example, I’m shooting with my 24-70 2.8 lens, which means the smallest aperture number is f2.8 and the largest aperture number is f22.
The tricky part about aperture is remembering that the lower the number, the wider the hole in the lens.
In this case, f2.8 is the lowest number and the widest aperture. The lower the number, the more light you’ll let in and the shallower depth of field (more blurry background) you’ll see.
The higher the number, the smaller the hole in the lens. So, f22 would be the highest number and the smallest aperture. The higher the number, the less light you let in and the more depth of field you’ll achieve (less blurry background).
There are several “stops” between the lowest and highest number that you can try. They are referred to as f-stops and they help you find the balance between your exposure and depth of field depending on what type of image you are shooting.
Aperture Demonstration
For the aperture demonstration, I’m shooting with my Nikon D750, my 24-70 2.8 lens, my Manfrotto Tripod and natural light from the window on the left. I set up a bowl of cherries using a white board from Ericksons Surfaces, a coral board from Texturit, a bowl from Anthropologie and a frayed linen I had in my prop closet. I used a Manfrotto Light Stand and clamps to hold the backdrop board in place.

Low Aperture Example
If you look at Image A below, the aperture is set to f3.2. This is a low number, which is a very wide aperture that lets in more light and gives me a shallow depth of field (more surrounding blur). Notice that the cherry in the center is in focus, but the surrounding cherries, part of the linen and the background appear more soft and blurry?
This is an example of how an image can look with a lower aperture. It’s important to note that the ISO and shutter speed are set to accommodate a lower aperture.

High Aperture Example
If you look at Image B below, the Aperture is set at f13. This is a high number which is a very small aperture that lets in less light and makes the surrounding subjects pretty sharp and in focus (much less blur). You’ll notice that the front cherry is in focus and the background and linen is much more clear in comparison to Image A.
This is an example of how an image can look with a higher aperture. It’s important to note that the ISO and shutter speed are set to accommodate a lower aperture. In order for me to demonstrate a higher aperture in image B (f13) below, I had to slow the shutter speed way down to let in more light to compensate for the lack of light the aperture could let in. If I hadn’t slowed the shutter down from 1/100 (image A) to 1/8 (image B), the image would have been too dark and underexposed.

Manual Mode: ISO
What is ISO?
ISO is how sensitive your camera’s sensor is to the light. A lower ISO means less light sensitivity (less light) and the less noise or grain you’ll see in your image. The higher the ISO, the more light sensitivity (more light) and the more noise or grain you’ll see in your image.
Noise or grain is basically a subtle grainy effect that can show up on an image when the ISO gets too high. Cameras start showing “noise” at different ISO settings depending on how advanced the camera is.
Generally, the more advanced the camera, the higher you can go with ISO before seeing any noise in your images. For example, my Nikon D750 starts showing noise at an ISO at around 10,000. Whereas, my first DSLR started showing noise at an ISO at around 800.
ISO Demonstration
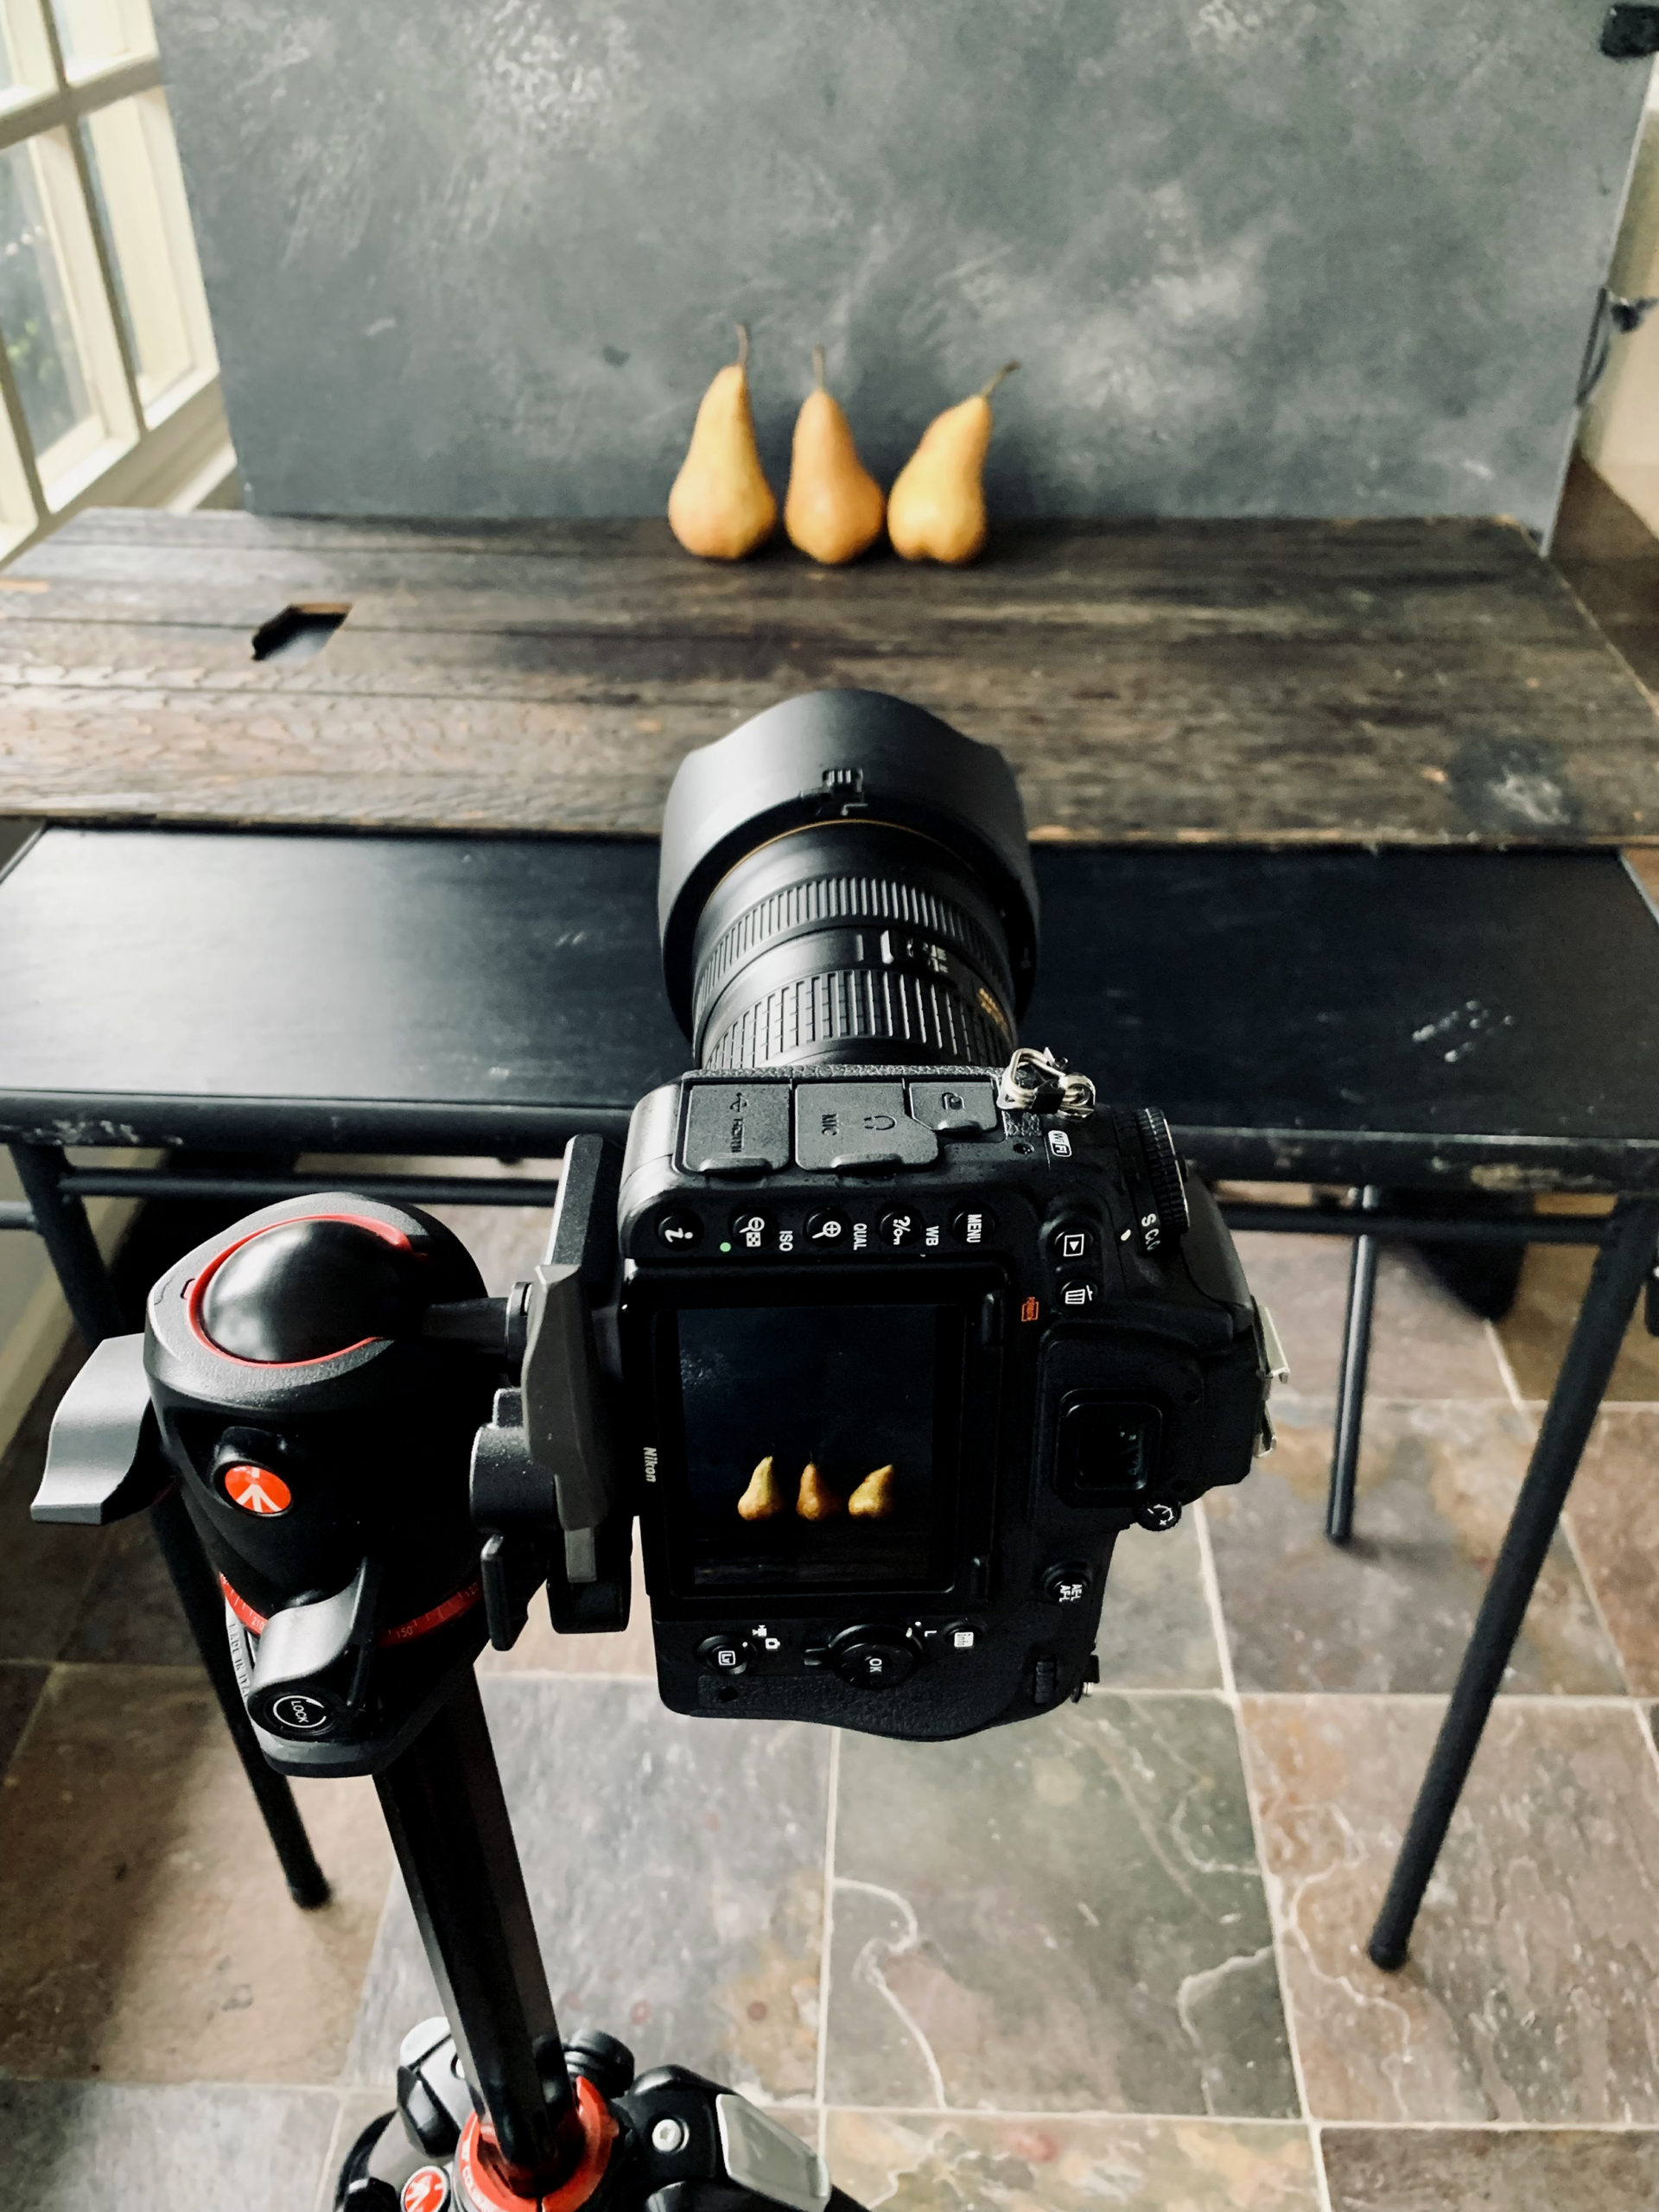
For the ISO demonstration, I’m shooting with my Nikon D750, my 24-70 2.8 lens, my Manfrotto Tripod and natural light from the window on the left. I decided to use three beautiful Bosc pears and switched out my boards for a more dark and moody look. I used a dark gray board from Texturit and a dark wood board that I found in our garage.
READ MORE ABOUT: GETTING STARTED IN FOOD PHOTOGRAPHY
Low ISO Example
Image C below is using a low ISO of 100, so you won’t see any noise in the image. In food photography, using a lower ISO is a pretty common practice, but this can definitely vary depending on the lighting conditions. I set my aperture to f7.1 for a sharper image and slowed my shutter speed to 1/5 of a second to let in extra light since the ISO and aperture weren’t letting in enough light. Because I was using a tripod, I could set my shutter speed nice and slow. If I was holding my camera, I wouldn’t have been able to set my shutter speed as slow, because it would pick up any camera shake and cause a blurry image.

High ISO Example
Image D below is using a much higher ISO of 12,800 and you’ll see some noise or grain in the image (especially in the skin and stems of the pears, if you look closely). To compensate for this high of an ISO, and because I wanted to keep my aperture at 7.1, I had to bump up the shutter speed to 1/640 so the image wouldn’t be overexposed or too bright.

Manual Mode: Shutter Speed
What is Shutter Speed?
Shutter speed is how long your shutter is open exposing the camera’s sensor to light. My Nikon D750 has a variety of shutter speeds ranging from 1/4000 (fastest) to 30 seconds (slowest).
The longer your shutter is open (a slower shutter speed), the more light can reach the sensor. A slower shutter speed also helps you capture motion blur, but will require a tripod to avoid camera shake.
The shorter your shutter is open (a faster shutter speed), the less light can reach the sensor. A faster shutter speed will also help you freeze motion.
In the examples above, you got to see how adjusting my shutter speed can help add or decrease light. For the shutter speed examples below, I want to demonstrate how shutter speed also helps you achieve motion blur and motion freeze. When you’re using your shutter speed to capture certain types of action shots, you will need to adjust your aperture or your ISO to compensate for the lack of light or too much light.
Shutter Speed Demonstration
When I’m using shutter speed to focus on capturing action, I’m usually shooting pours, splashes or people. For the examples below, I don’t have behind the scenes images, but I will explain how the images were shot.
Fast Shutter Speed Example
Image E is an example of using a faster shutter speed (1/200) where I froze the ice splashing into the coffee. I used two strobe lights positioned on each side of the coffee mug. It’s important to note the use of artificial lights in this image example. Shooting with artificial lights requires your light(s) and camera to be in sync. The shutter speed had to be set to 1/200 to work with my lights. Notice how my aperture (f14) and ISO (100) are set to not let in a bunch of light too? This is because my strobes were my light source and they had enough power to light the image despite my camera settings.
If you’re shooting with natural light, you can use a much faster shutter speed than 1/200. This is because you don’t need to sync the shutter speed with artificial lights.
READ MORE ABOUT: ARTIFICIAL LIGHTS FOR FOOD PHOTOGRAPHY

Slow Shutter Speed Example
Image F below is an example of a slower shutter speed. I like to blur motion when I’m shooting people preparing food in the kitchen or drinks in the bar. I think the motion blur helps tell the story. I did not use artificial lights for this shot. However, there wasn’t a lot of natural light to work with inside, so I had to adjust my settings to expose the image correctly.
Notice the shutter speed is set to 1/80. This helped me capture that motion blur of the mixologist’s hands. However, since there wasn’t a lot of natural light coming into the bar, I had to bump up my ISO to 2000 and reduce my aperture to 3.5 so I could get the exposure I wanted. Luckily, my D750 camera handles higher ISO’s really well, so this didn’t cause any noise or grain in the image.
When you’re shooting with slower shutter speeds, you will want to stabilize your camera on a tripod. This helps you avoid camera shake which can result in a blurry image. A general rule I have is I won’t hold the camera if I need to use a shutter speed lower than 1/80. There are different opinions about this, but I just don’t trust my hands not to cause a blurry image with slower shutter speeds.
READ MORE ABOUT: THE BEST CAMERA FOR FOOD PHOTOGRAPHY

How To Fix Poorly Exposed Images in Manual Mode
When you learn manual mode, you are probably going to take images that are either too bright or too dark. This is just part of the process of figuring out how aperture, iso and shutter speed work together. When you adjust one setting, you may have to adjust the others to compensate.
Let’s look at two poorly exposed images and the settings below. I’m using the same setup with the bowl of cherries as above. Feel free to refer back to those camera settings as a reference, if it’s helpful to compare and contrast.
Overexposed Image Example
Image G is super overexposed. Let’s look at the settings and see where we could make adjustments.
 Solutions for Overexposed Images
 Solutions for Overexposed Images
APERTURE
The aperture is set to f3.2, which is a low number causing a wider hole in the lens. Remember, the wider the hole, the more light you are letting in. You could explore bumping up the aperture to create a smaller hole to let less light in.
SHUTTER SPEED
The shutter speed is set to 1/10 which is pretty slow. A slower shutter speed lets more light in, so you could try speeding up the shutter speed to let less light in.
ISO
The ISO is set to 400, which isn’t very high, but it could be set lower to let less light in.
Underexposed Image Example
Image H is really underexposed. Let’s look at the settings and see where we could make adjustments.

Solutions for Underexposed Images
APERTURE
The aperture is set to f6.3. While this isn’t that high of an aperture, you could lower it to let more light in.
SHUTTER SPEED
The shutter speed is set to 1/80, which isn’t very fast. However, if you’re using a tripod, you could slow it down even more to let more light in.
ISO
The ISO is set to 100, which is nice and low. You could bump it up to let more light into the image.
In conclusion, when you’re ready to learn manual mode, it requires practice. But, you’ll be surprised at how quickly you’ll catch on to how it works. The more you practice, the easier it becomes to adjust your settings without really thinking about it. Soon you’ll see a massive improvement in the quality of your images, because you are making the artistic decisions – not your camera. 😉 Reach out with questions anytime!
Happy Creating!
—
This post contains affiliate links which means if you click or make a purchase through my site, I might make a small commission at no extra cost to you. I only promote products that I actually use and support.
—
All images ©Regan Baroni 2020.
Comments +