One of the most powerful tools in a photographer’s toolkit, especially when they’re starting out, is the rule of thirds grid. Food photography is an artistic skill that, in order for you to succeed, requires practice, patience, and the correct use of the right tools. When I first started capturing food images, I quickly realized that I would need far more than simply a delicious looking dish and good lighting (though that’s definitely important!)
I learned after a while that composition techniques can either make or break your image. If you want to create shots of dishes and food items that immediately make people pump the brakes when they’re browsing the web or social media, composition is everything.
If you’re new to food photography or are looking to improve your skills, understanding what a rule of thirds grid is and how to use it properly will transform your images. I’m going to walk you through everything you need to know about this essential composition tool.
This is a guest post provided by Catalina Aldridge who is a copywriter & photographer based in the UK. This post may contain affiliate links. Read the affiliate disclosure.
What Is The Rule Of Thirds Grid
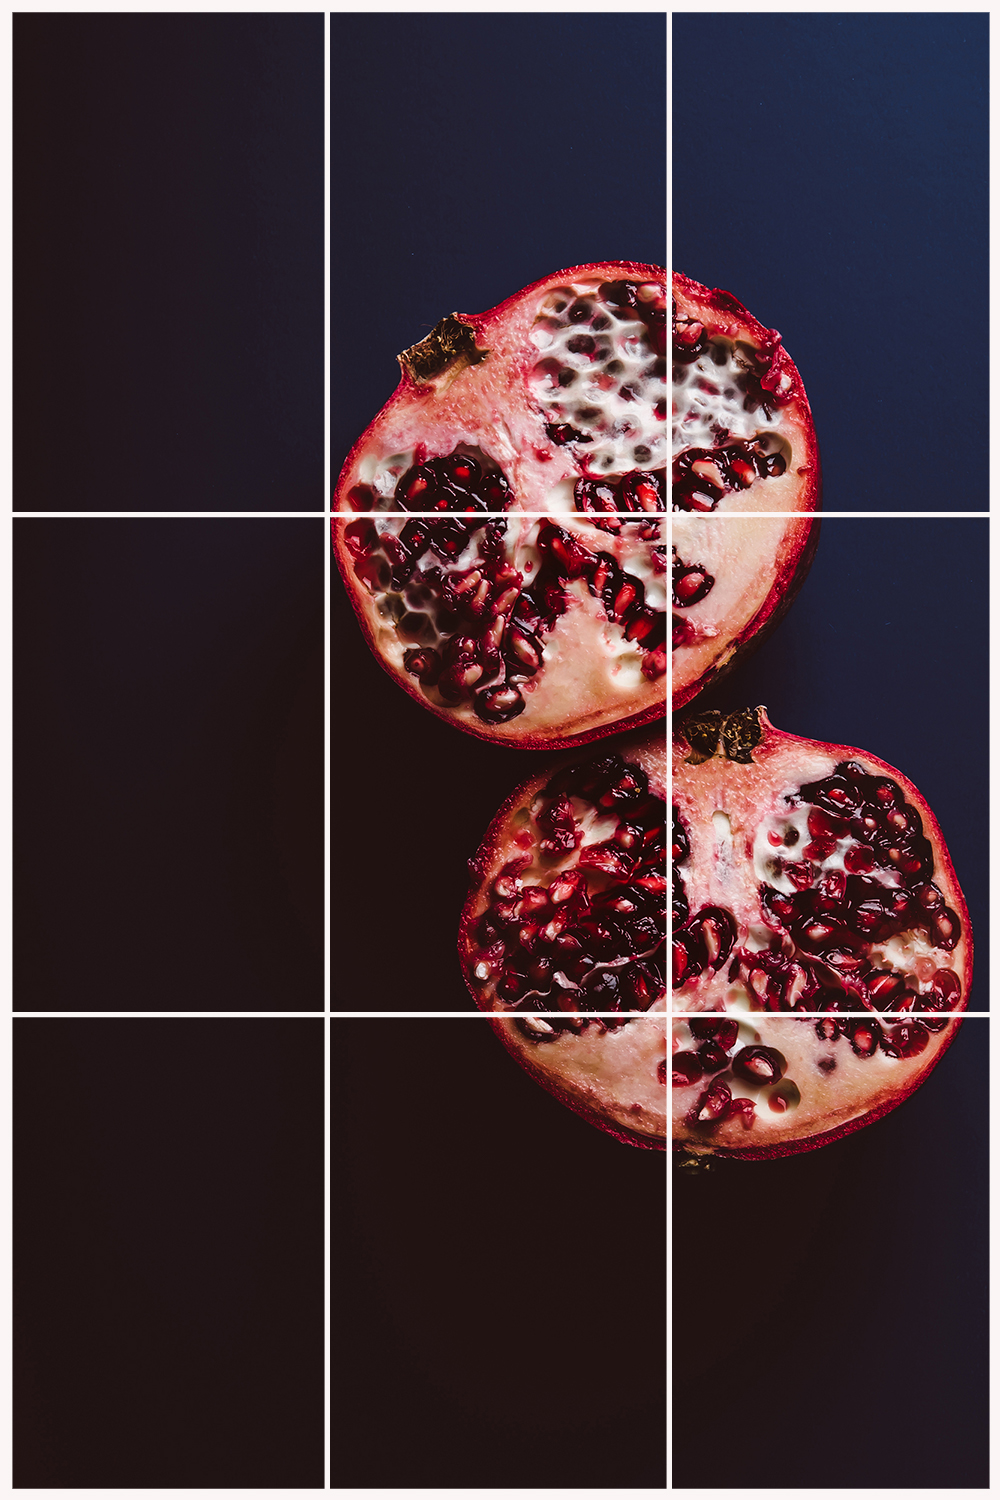
The rule of thirds grid is a pivotal composition technique that is designed to help photographers create more balanced and aesthetically pleasing images. Imagine dividing your camera frame into nine equal parts, made up of two equally spaced horizontal and vertical lines. These grid lines intersect at four key points, essentially, the corners of the centermost square.
When you activate the rule of thirds grid on your camera or smartphone, you’ll see these lines overlaid on your screen or viewfinder, but they don’t appear on your final image.
This helps you position the important elements of your subject(s) more strategically. The four intersection points, where the vertical and horizontal lines meet, are the most natural spots where the viewer’s eyes tend to gravitate.
Placing your focal point or key subjects along these lines or at these points will help you take photos that feel more dynamic and engaging than simply placing them in the center.
Why Do Photographers Use the Rule of Thirds Grid?
Compositional Balance
The rule of thirds helps you avoid the common mistake of placing your subject directly in the center of the frame. While this can occasionally work, some food photos feel static and one-dimensional when they’re bang in the middle. Using the grid to position important elements off-center gives your viewers more things to focus on in the image, creating a sense of movement. Subjects don’t all have to be symmetrical (far from it); positioning your main subject along a vertical line while allowing negative space on the opposite side creates visual breathing room.
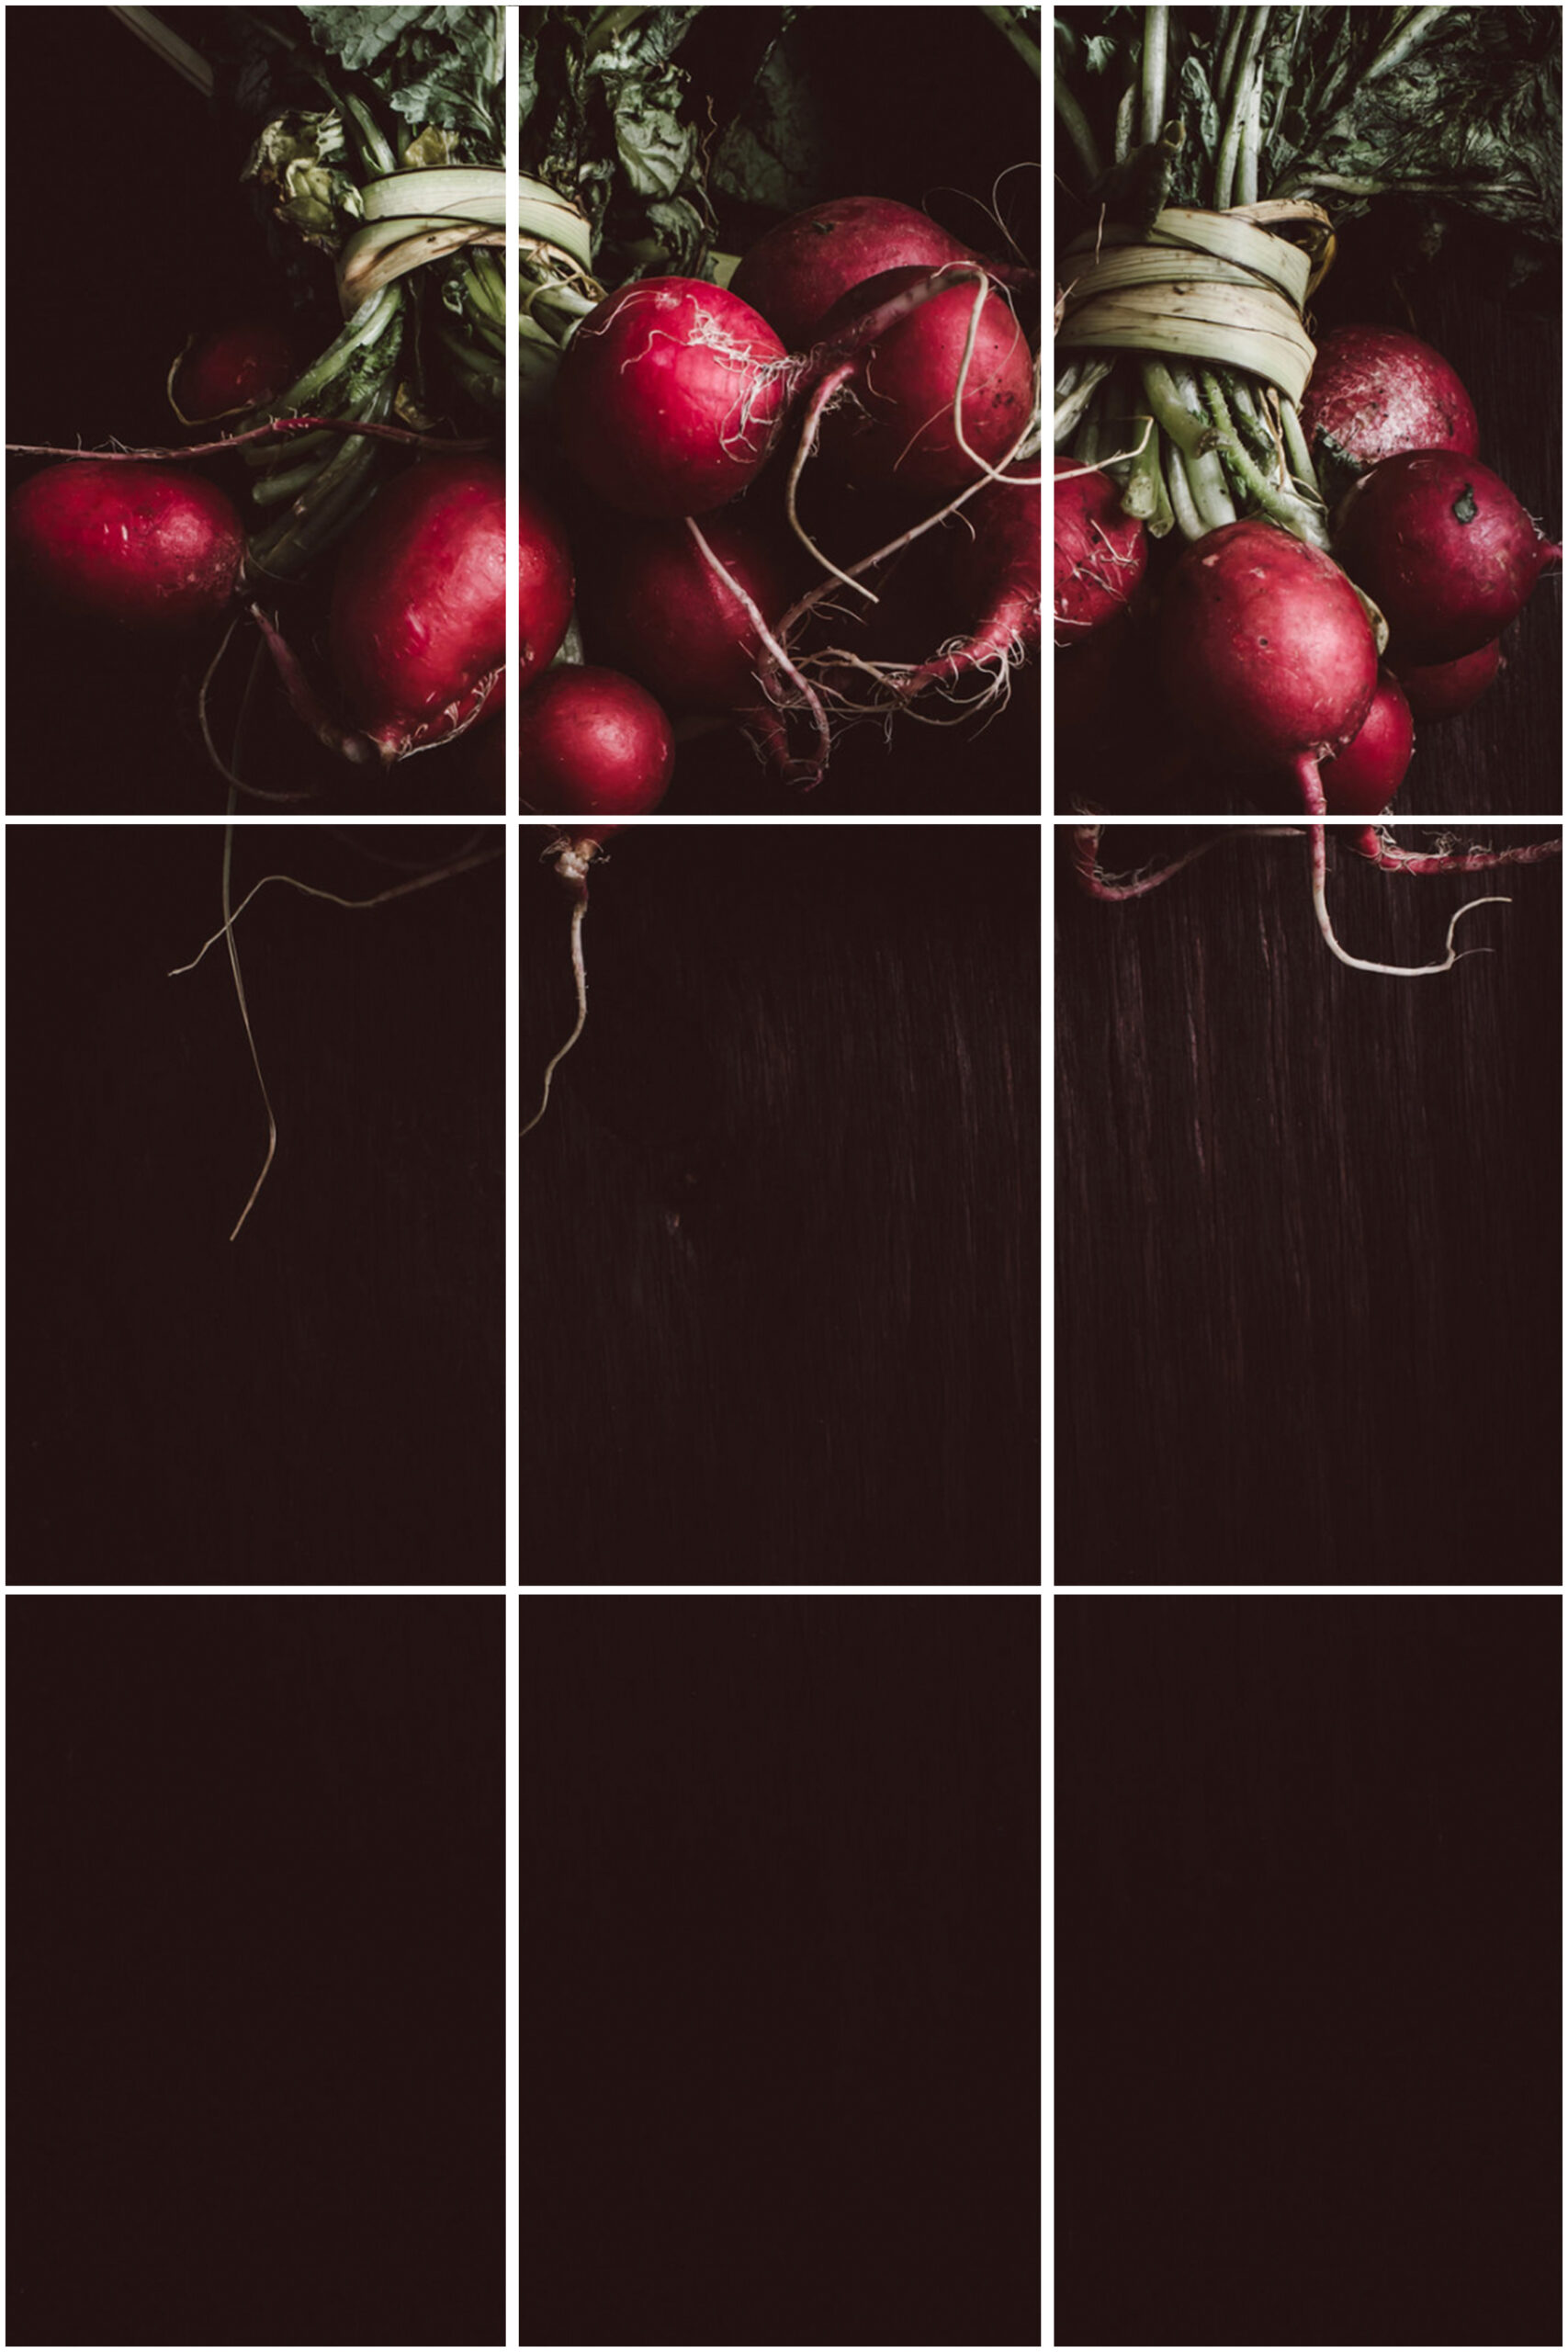
Adds Visual Interest
Food photography that follows the rule of thirds tends to feel more dynamic and story-driven. Getting accustomed to working with the grid helps you think about the relationship between different elements in your frame. Maybe you position a drink along the right vertical line, the main portion along the bottom horizontal line, and a side dish in the background intersecting the top left corner of the center square. These choices make food images more compelling, while encouraging viewers to scan across multiple subjects, rather than just one.
How Does the Rule of Thirds Grid Work in Photography
Your Frame is Split into Nine Equal Parts
The mechanics of the rule of thirds are very simple – you’re dividing your screen into nine equal sections (whether portrait or landscape). Two vertical lines and two horizontal lines appear, each positioned one-third of the way across and down the frame. Most modern cameras are equipped with technology to trigger the electronic viewfinder or LCD screen in the settings, but if your current gear doesn’t have this don’t feel pressured to buy brand new upgrades. Given photography equipment holds its value well, the used camera market is an excellent place to find reliable tools that will allow to easily compose shots that follow the rule of thirds.
Placing Subjects at Intersection Points
The four points where your grid lines intersect represent the areas of your frame that naturally attract the most attention, making them ideal positions for your focal point(s) and subject(s). In food photography, this might mean positioning a finished recipe or the main product at these points. However, you don’t need to use all four in every image, sometimes just one suffices.
Using Grid Lines as Visual Guides
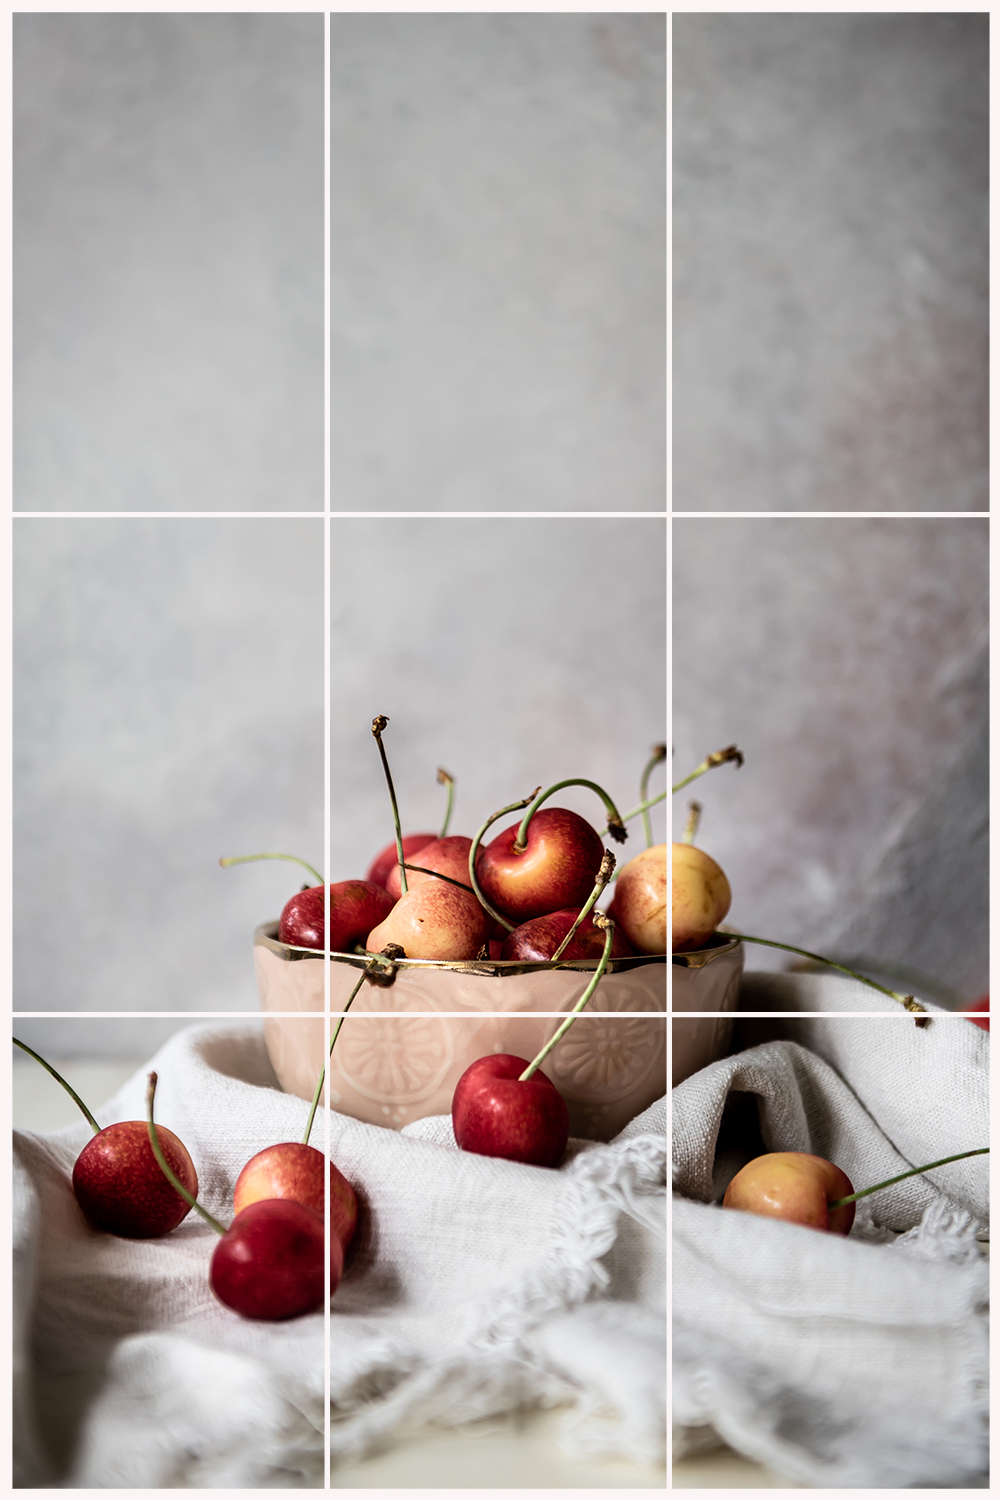
The grid lines themselves act as a guide for aligning elements within your photo. For example, horizontal lines work well for establishing where your main subject sits in respect of your background and foreground, to create more depth. Vertical lines can also do the same thing. Experimenting with the rule of thirds across different food image types, whether it’s a website hero image, a product listing, a sponsored social media post, Reel or how-to guide, can really add more professionalism and quality to your shots.
The best part is if you’re shooting with a smartphone, activating the grid is easy. You can find detailed instructions in my post about iPhone photography tips, which covers how to turn on the grid overlay in your phone’s camera settings.
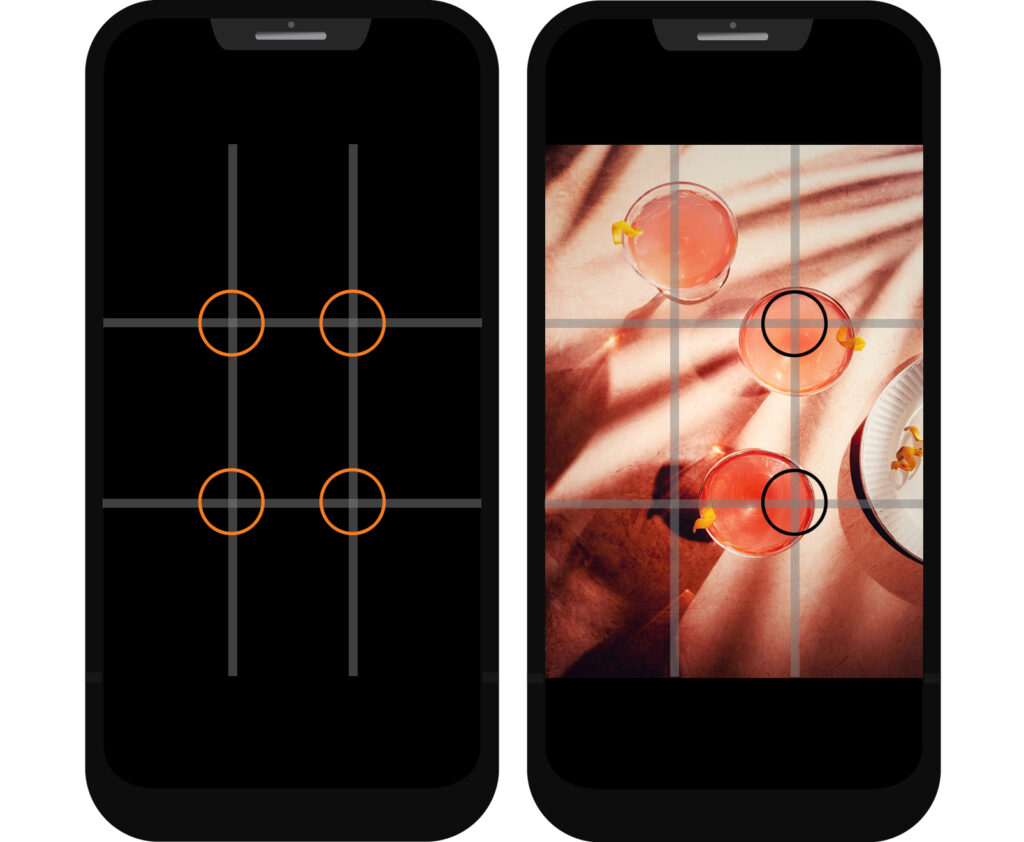
How Do You Use the Rule of Thirds Grid in Food Photography
Place Your Main Subject(s) Off-Center
Centering your subject is counterintuitive to the rule of thirds. Instead, try positioning it along the leftmost or rightmost vertical line to create a more sophisticated composition. Think about the direction you want your viewers’ eyes to move. Practice composing several versions of the same shot with your subject positioned at different intersection points on the grid.
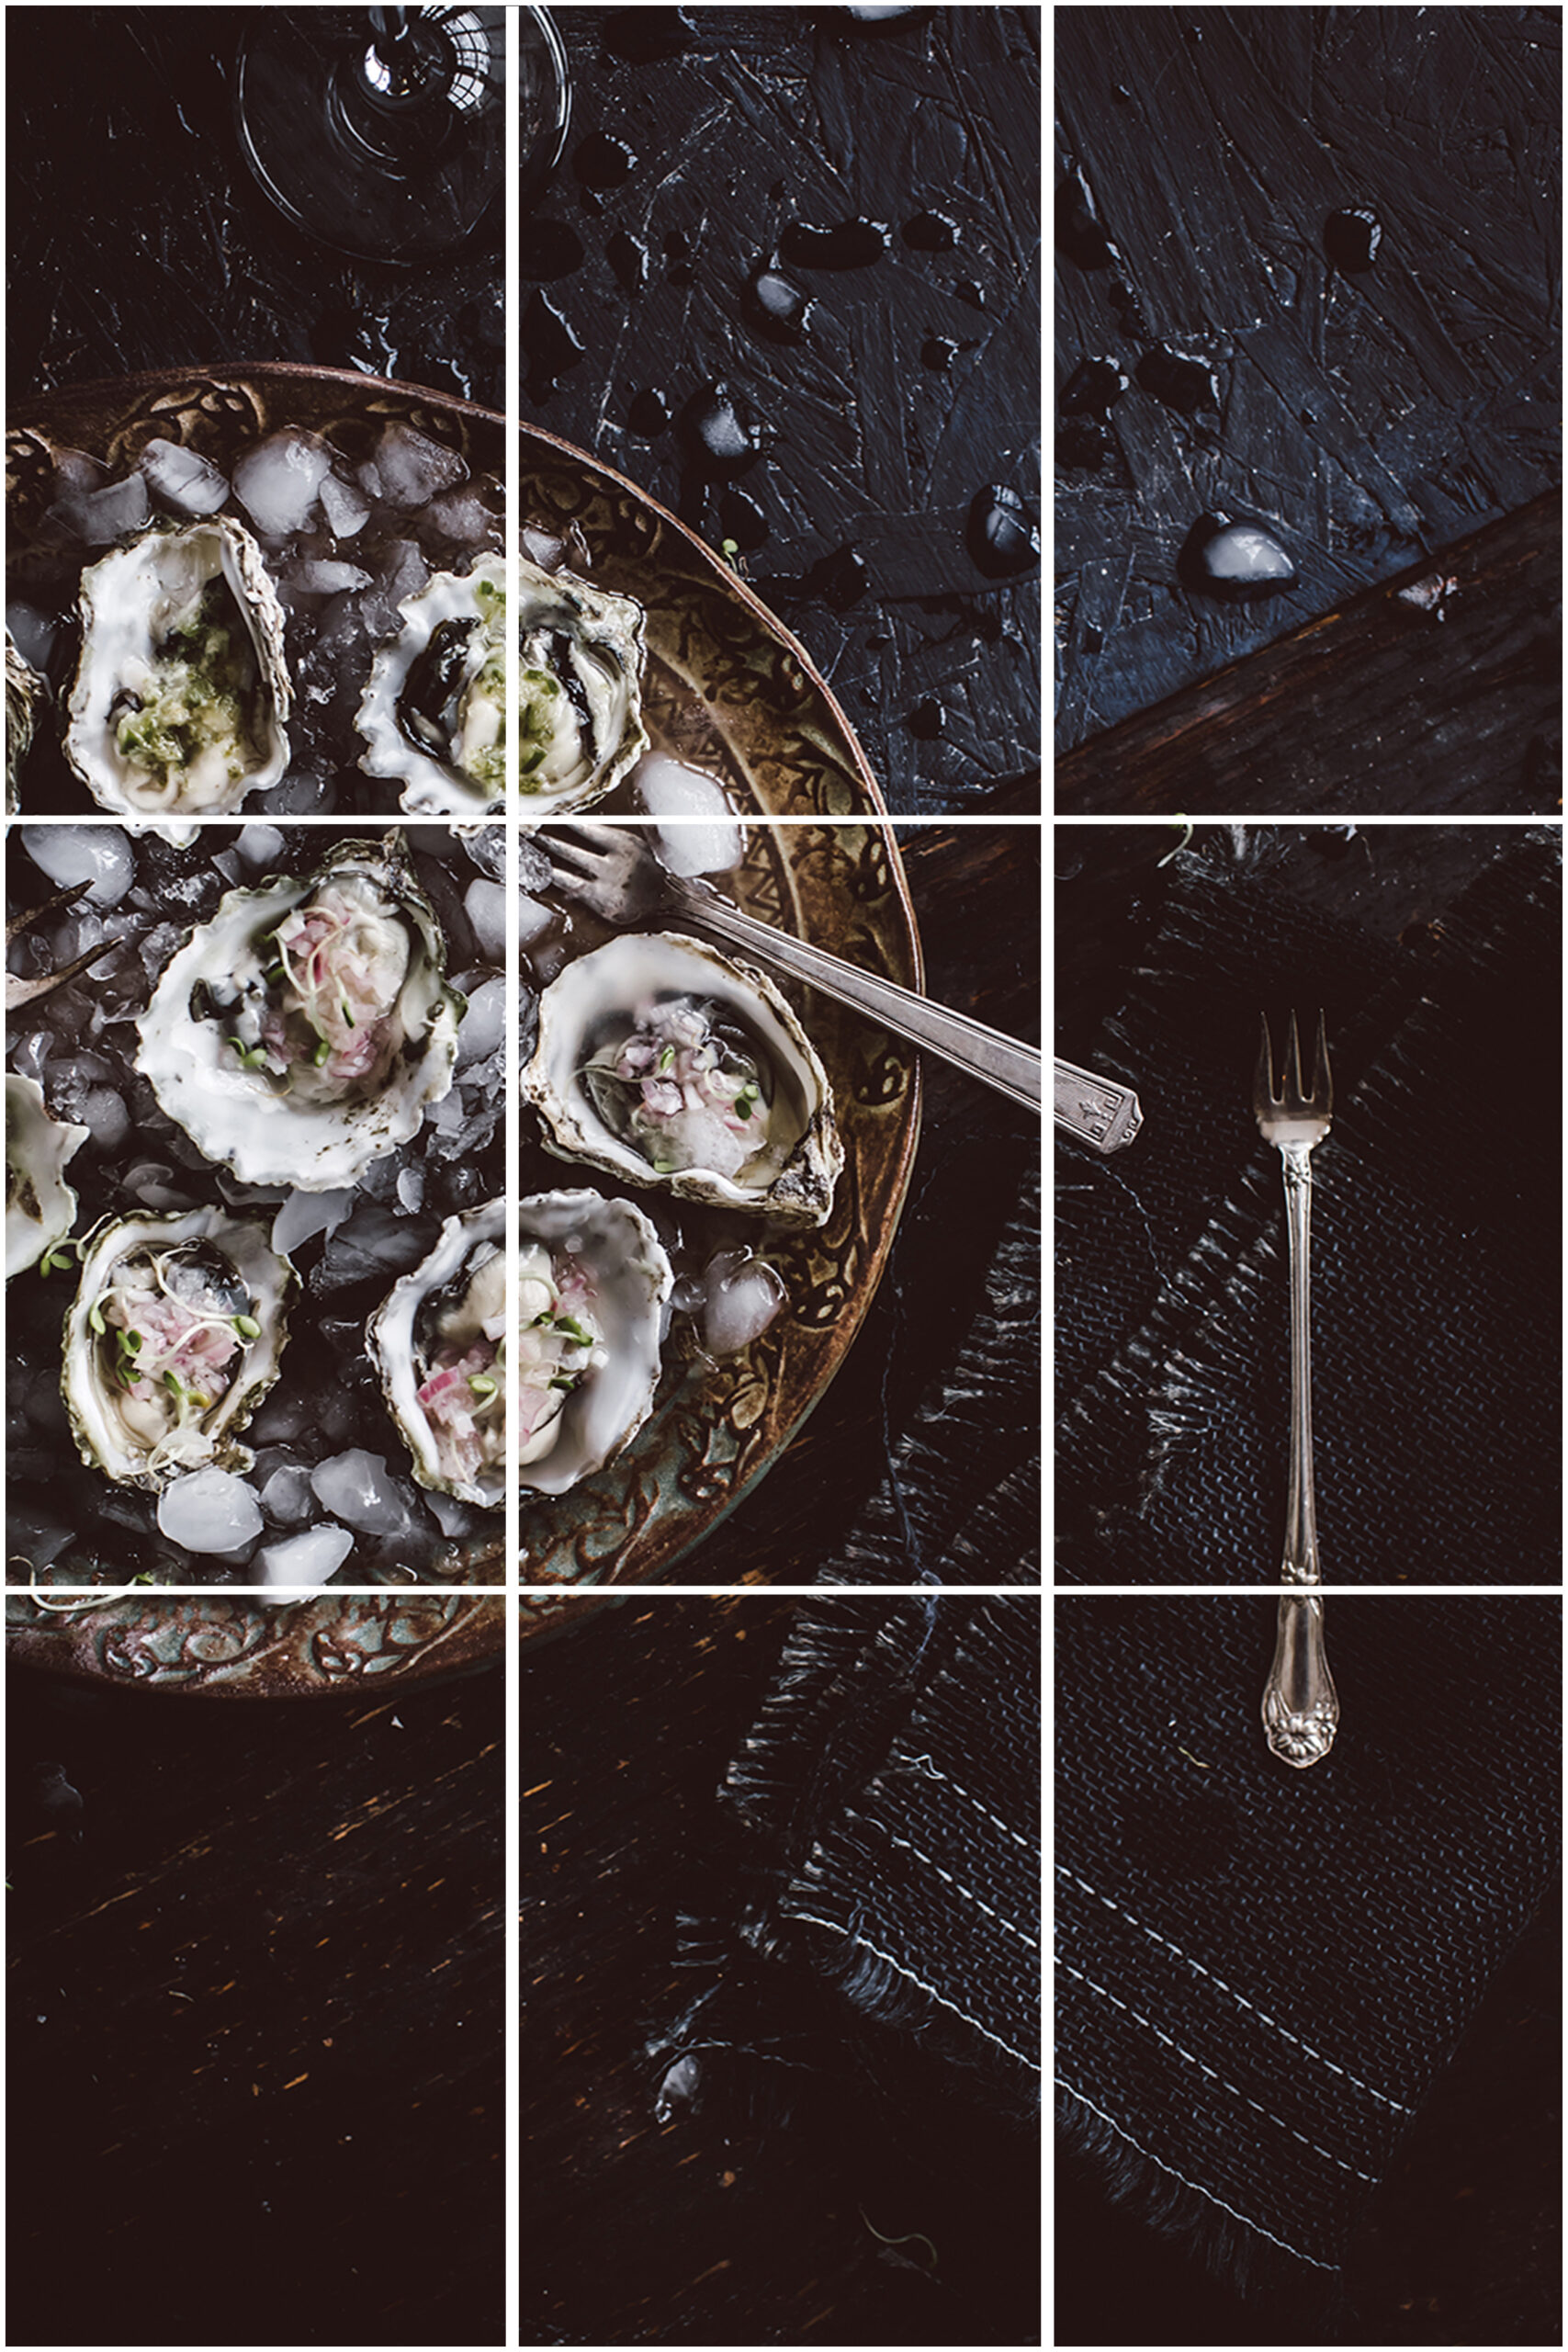
Utilize Negative Space Well
The empty areas around your subject become much more international when you use the rule of thirds grid. Photos don’t have to have content consuming every corner of your frame. Instead, grid lines can help you balance the use of filled and empty space.
For instance, if you position your main dish along the bottom horizontal line and the right vertical line, there’s substantial negative space in the upper left part of the frame that proves undistracting. This can make your images feel more elegant, and it also gives room for text overlays. This follows another key principle: depth of field, which you can learn more about in my guide on how to shoot in manual mode.
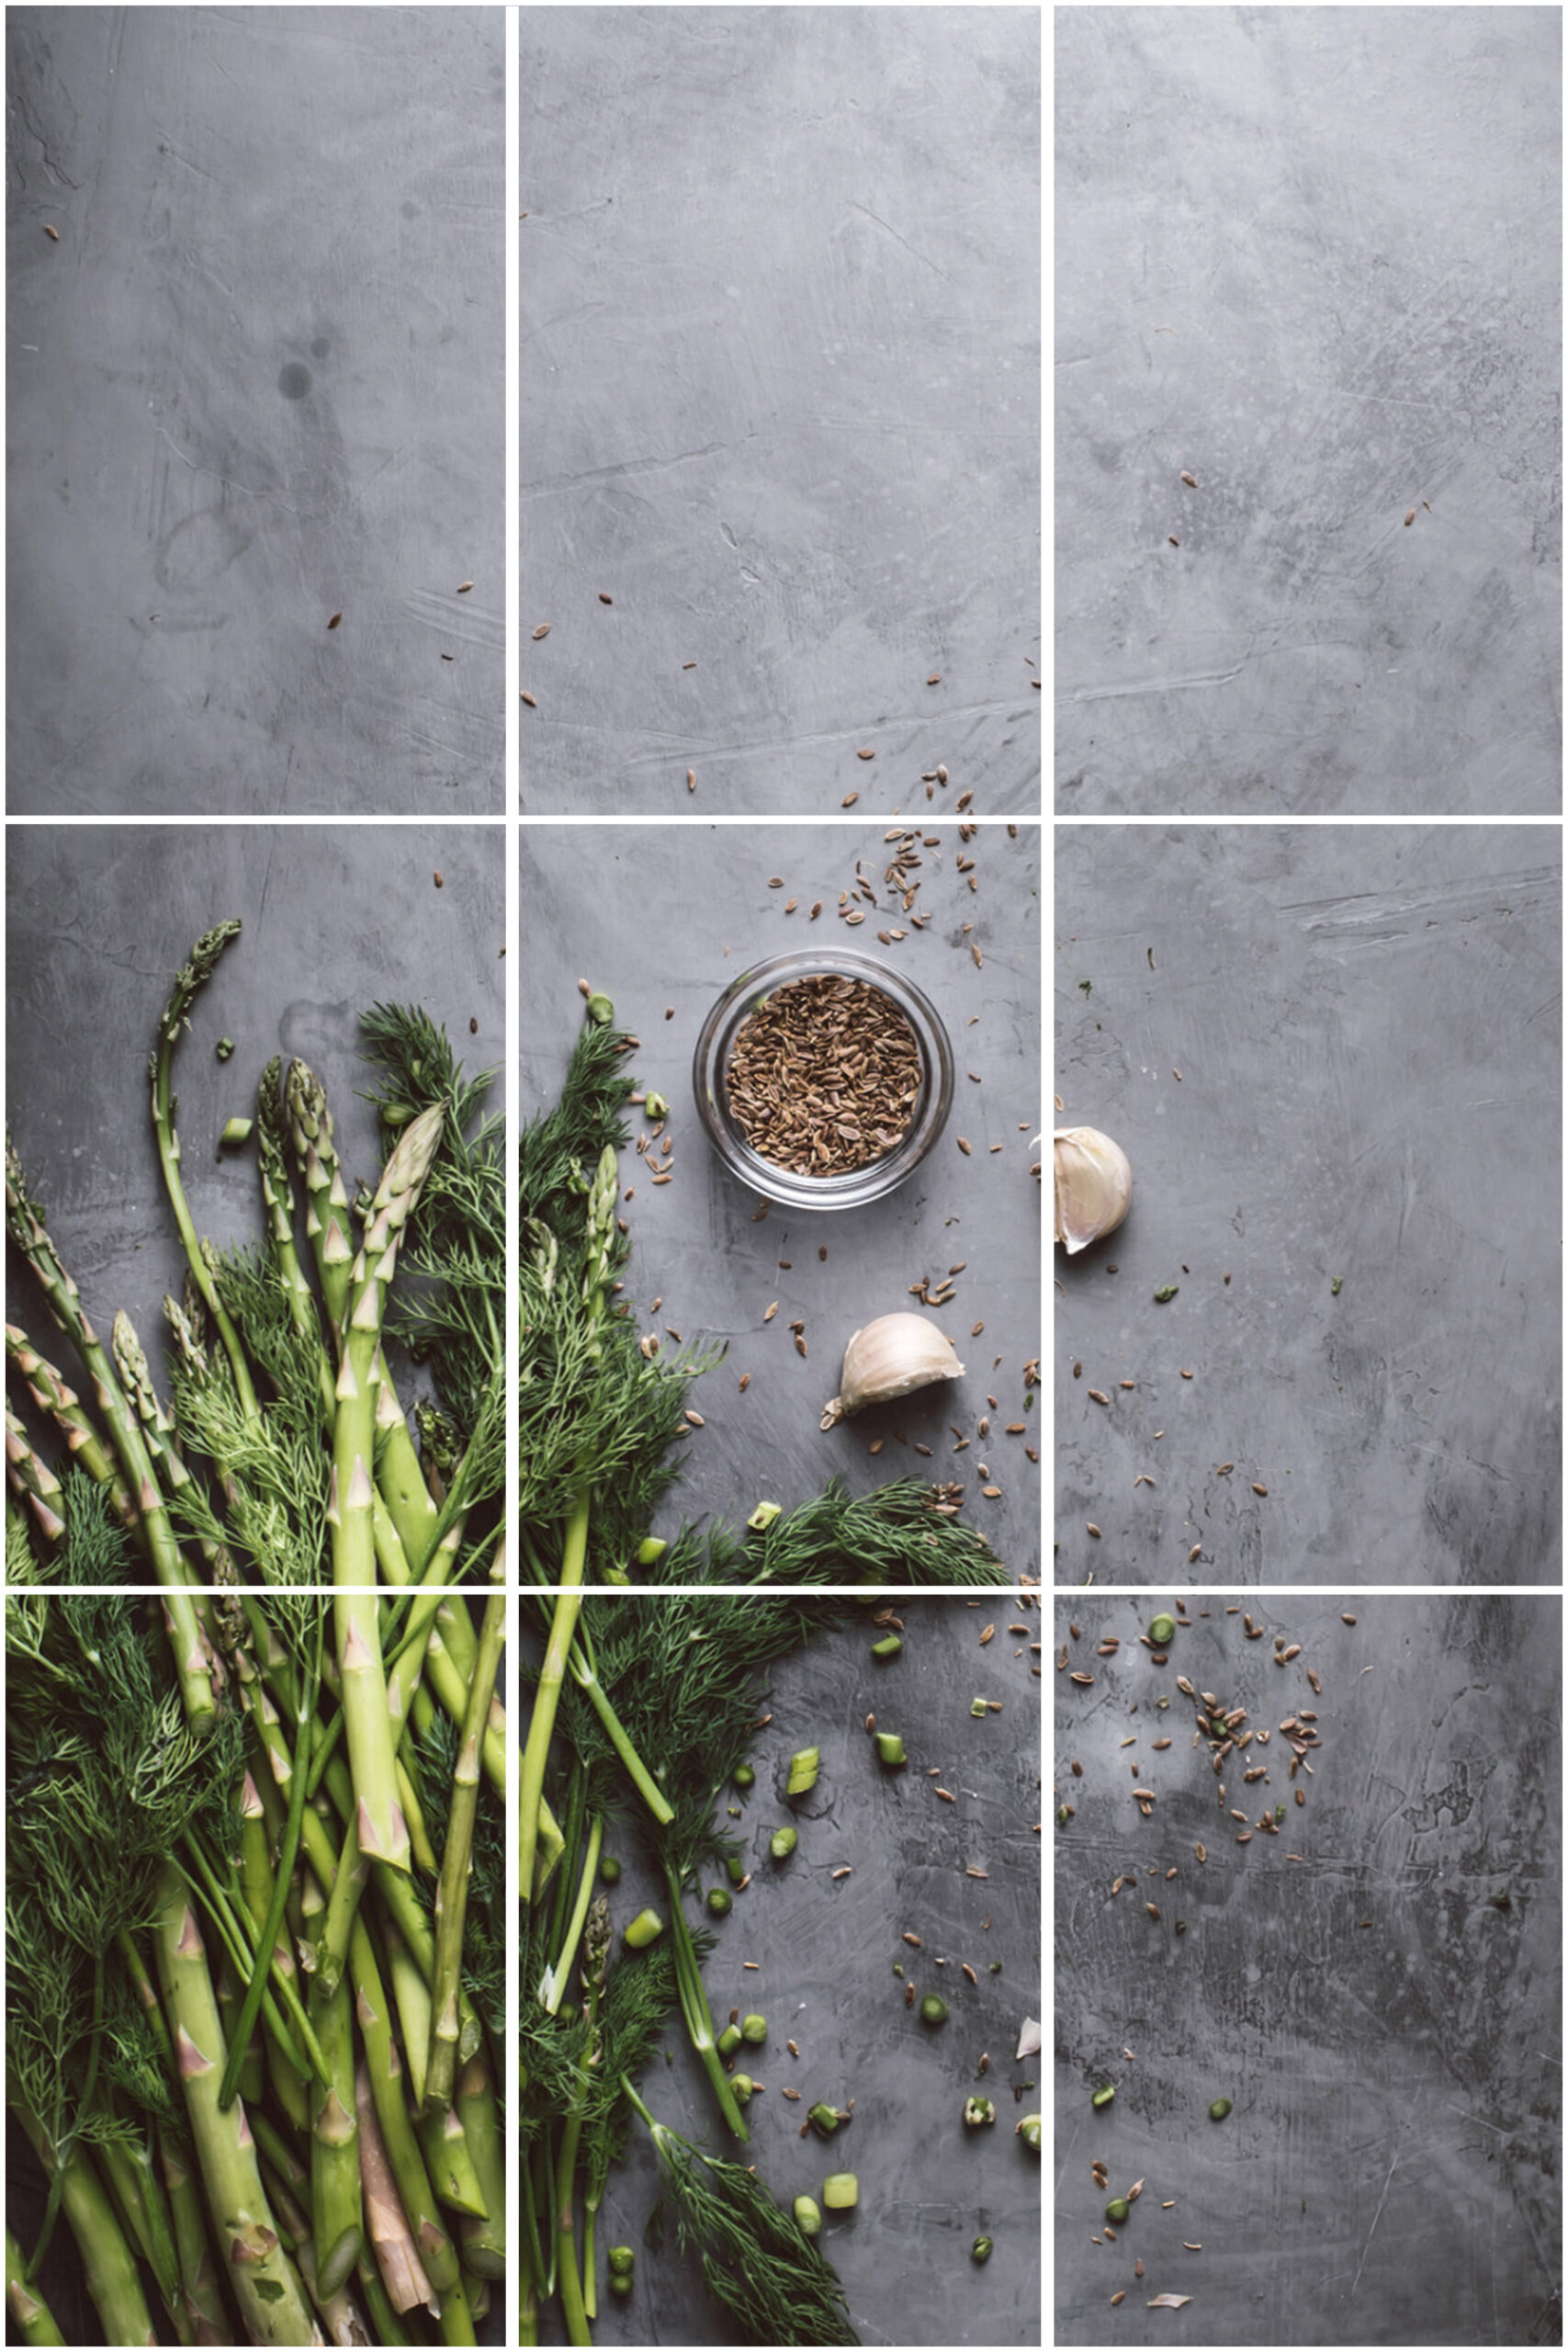
Image Layers and Focus
The rule of thirds isn’t just about where you place your subjects on a 2D grid. It’s also designed to help you think about creating as much depth as possible within your frame. Use the grid to think about foreground, middle ground, and background layers, as well as keeping subjects in-focus and out-of-focus. This approach, coupled with the rule of thirds, allows you to capture stunning images with depth and dimension. Each layer then has its own space and purpose, preventing your images from feeling too cluttered.

In conclusion, the rule of thirds grid has helped me think more purposefully about composition and build my artistic eye. While it’s important to understand and practice this composition technique when first starting out, remember that rules in photography are meant to be broken. As you grow more comfortable using this grid, over time you’ll start to recognize when following it works and when breaking away makes sense. Practice regularly, don’t be afraid to experiment with different styles and approaches, and always keep learning.
Happy Creating!
This is a guest post provided by Catalina Aldridge who is a copywriter & photographer based in the UK. This post may also contain affiliate links which means if you click or make a purchase, I might make a small commission (at no extra cost to you). I only promote products and equipment that I actually use for my photography business. Your support helps me continue to produce educational content about photography. Thank you!
All images ©Regan Baroni 2025.
Comments +