Learning how to set up your lights for drink photography can be game-changing for your images. If you’re not as familiar with how different light placements can affect your images, it can be a bit of a guessing game until you start experimenting. Come behind the scenes with me and I’ll show you some different drink photography lighting setups using artificial lights.
This post contains affiliate links. Read the affiliate disclosure.

How To Set Up Your Lights for Drink Photography
Before we dive in, here’s what you can expect from this post. I’m going to show you some drink images, along with an image from “behind the scenes” during the photo shoot. This will help you see where my lights are placed in relation to the drink and the type of results you’ll get from that particular placement and equipment.
The equipment I’m using in these drink photography lighting set ups is listed below.
CAMERAS
LENSES
- 105mm 2.8 (Nikon)
- 24-70mm 2.8 (Nikon)
- Fujinon 18-55mm 2.8 (FujiFilm)
TRIPOD & SETUP
ARTIFICIAL LIGHTS
- Paul C Buff White Lightning 1600
LIGHT MODIFIERS
TETHERING TOOLS
SURFACES & BACKDROPS
READ MORE ABOUT: HOW TO LIGHT A BOTTLE WITH ARTIFICIAL LIGHTS

Lighting Setups for Drink Photography
1. Side Light for Drink Photography
A lot of food photographers will light their food from the side. So, let’s start with lighting your drink scene from the side as well. This basically means your light is positioned on one (or both) sides of the drink, depending on how many lights you’re using.
THE SETUP
In the coupe glasses image below, I used one strobe light positioned on the right side of the glasses.
I also used double diffusion to soften the light reflections on the glassware. This means I had a softbox over my artificial light and a large diffuser in front of the softbox. Double diffusion helps prevent the reflections in the glassware from looking too bright. You’ll notice the reflections on the glass appear soft and not too harsh or distracting.


2. Back Light for Drink Photography
Back light is a beautiful way to light your drink photography and is also a very popular way to light drinks. This simply means that you are positioning your light behind your drink.
THE SETUP
For the next lighting setup, I placed a martini glass on top of a black reflective surface and positioned a piece of black foam board directly behind the martini glass.
I placed one strobe directly behind the black foam core and positioned the light a little higher than the height of the foam board.
I used a large soft box again to keep the light soft.
Now, one might think that the light would be completely blocked by the black foam core, preventing it from lighting the glass. But, because the softbox was larger than the black foam board, the light was only partially blocked. Using the right amount of power, the light was able to sneak passed the black foam board on both sides and from slightly above the height of the board.


3. Back Light & Gels
This is another back light example using gels to create a cool color effect with your glassware. Gels are transparent, colorful materials used to create a variety of different color effects in photography. You simply place different colors of gels over your light source to see the effect it can have on your drink photography.
THE SETUP
I positioned my artificial light directly behind the wine glass. I did not use a softbox over my light. Instead, I placed a large diffuser in front of the light to help soften the light. Then, I put a gel over my light to create a cool color effect.
I raised the light a bit to great more of a gradient of light starting from the top and getting a little darker towards the bottom.
The images shot below shows how the image looks with a pink gel vs. using no gel at all. It’s kinda fun to see what you can do with gels, isn’t it? 😉


4. Hard Light
Hard light is when your lighting is much more direct and exposed. This can create a beautiful bold look in your images, because there’s more contrast and much stronger shadows. The way to create hard light is to not use a modifier over the bulb on your artificial light.
PRO TIP: When you cover the bulb of your light with modifiers (like a large soft box, umbrellas or diffusers), you will create soft light. If you take the modifiers away, you will create hard light.
THE SETUP
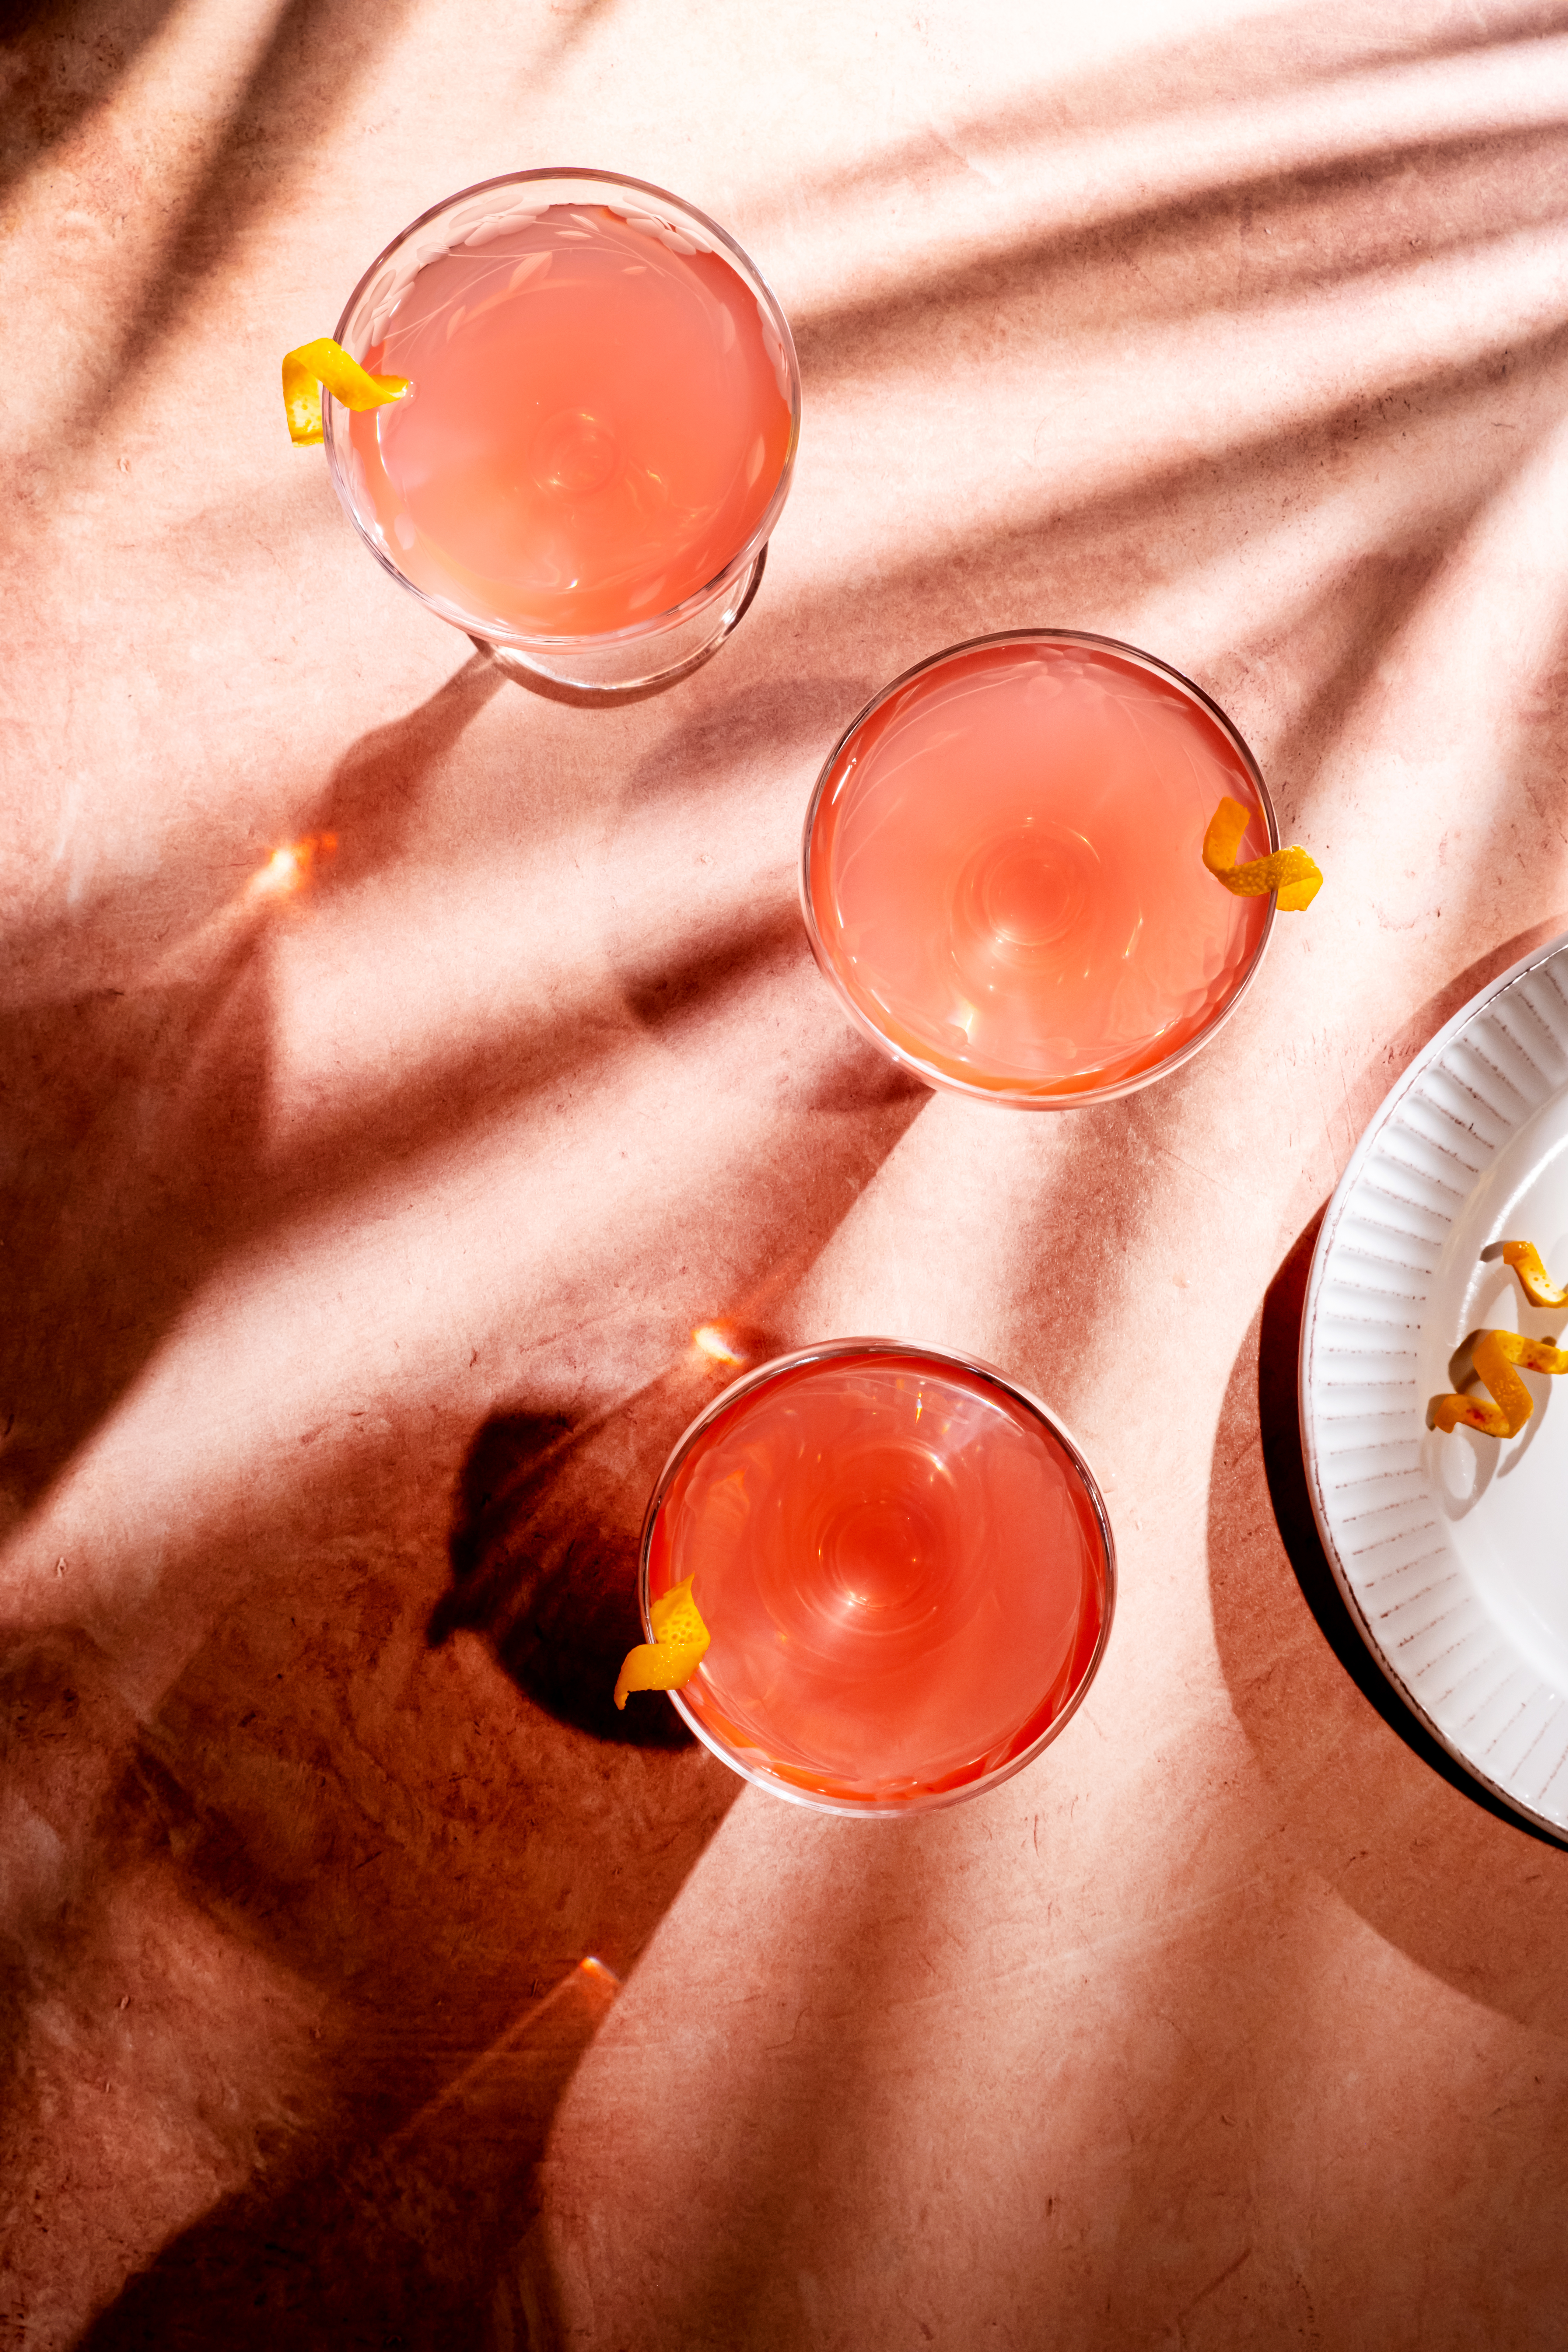
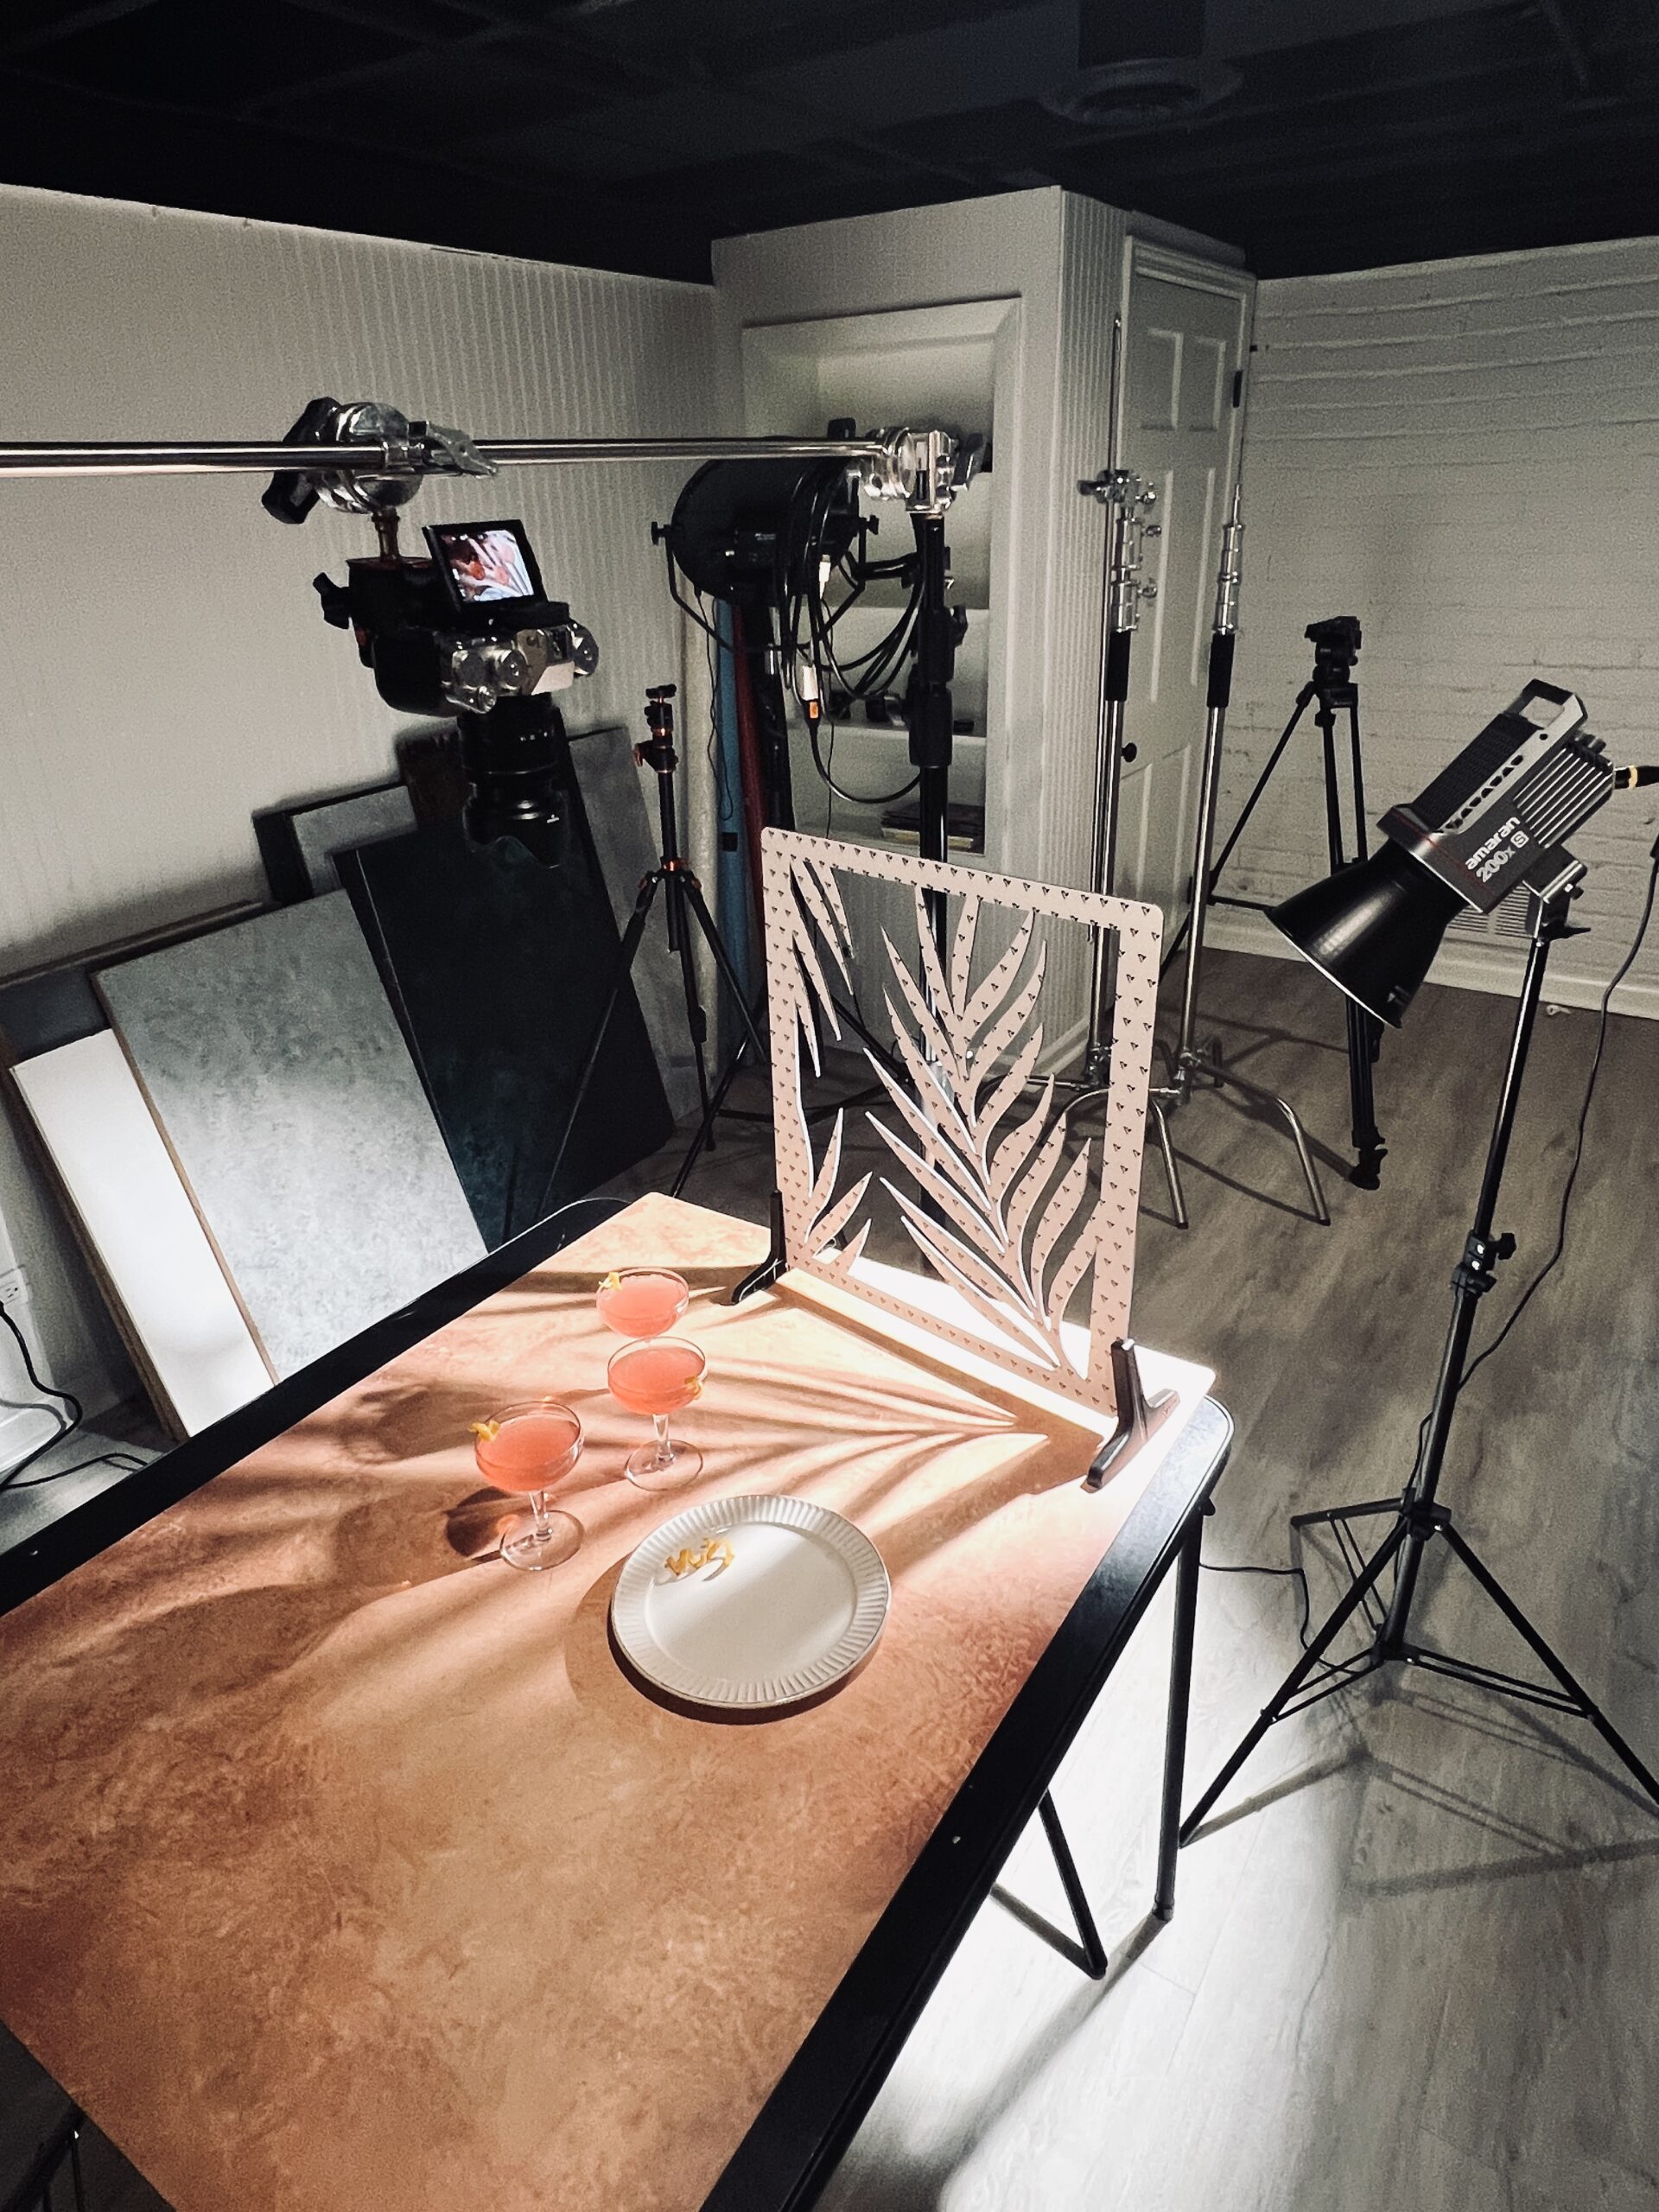
I placed one strobe on the right side of the glasses and positioned it slightly above and in front of them.
I exposed the bulb on my light and didn’t use any modifiers or diffusion. This caused the light to be more direct and create stronger shadows, similar to a bright, sunny day.
The palm frond was used to create shadows of palm trees in the background.
Btw, before I discovered shadow boards, I had to “get creative” with using this aluminum wire to position the palm frond correctly to get the strong shadows to look right. It looks like a bit of a mess behind the scenes, but it got the job done.
I recommend getting some shadow boards for an easier setup, which you can see in the next example.
READ MORE ABOUT: GETTING STARTED WITH ARTIFICIAL LIGHTS


5. Hard Light & Shadow Boards
When trying to get a hard light look in your drink photography, shadow boards can really come in handy. These are boards with special cutouts to help you create different types of strong shadows in your images. No palm frond or aluminum wire required. 😉
THE SETUP
In the example below, I set up my shadow board at the top of the image positioned a little closer to the right side. I placed an artificial light with a beauty dish behind the shadow board. A beauty dish can help make the light look a little more directional as opposed to just leaving the bulb exposed. I raised the artificial light up a bit and pointed the light dramatically down towards the shadow board and surface.
This setup helped create a similar look to the sun shining in through the window, and created some nice long shadows.


6. Soft Light
Soft light is when the light is evenly balanced and more spread out over your subject. It creates a balanced lighting look in your images with softer shadows. The way to achieve soft light is by having a variety of light modifiers to work with. Some good modifiers to have on hand include:
- Softboxes
- Umbrellas
- Large diffusers
THE SETUP
In the Benham’s Gin example below, I used one strobe with an umbrella positioned near the top of the bottle/image. This helps me create light at the top of the image that subtly gets darker towards the bottom of the image.
READ MORE ABOUT: MY OVERHEAD SETUP FOR FOOD PHOTOGRAPHY


Drink photography lighting is a lot of fun to experiment with. And, the more control you have over your lighting, the more creative you can get with it. I hope my behind the scenes demonstrations helped you see how you can experiment with light in your drink photography.
Happy Creating!
This post contains affiliate links which means if you click or make a purchase through my site, I might make a small commission at no extra cost to you. I only promote products that I actually use and support.
All images ©Regan Baroni 2021.
Comments +