I love to take regular food around the house and turn it into something beautiful with my camera. But, rather than just show you the final images, I want to take you behind the scenes. How we see things day-to-day isn’t the same as how we might see them through the camera. I hope this posts demonstrates that there’s a process with food photography… maybe it will inspire you to pick up your camera and create something unexpected.
This post contains affiliate links. Read the affiliate disclosure.

Food Photography Behind The Scenes
In food photography, there are two sides: the creative side and the technical side. My advice to all of my readers is not to get too hung up on the technical side. If you have a camera, a lens and some editing software you are in a great place to start creating something beautiful. Your creative vision plays the leading role in your photography. The technical stuff is just there to support it. As you practice, your creative vision evolves and as your creative vision evolves, you’ll discover equipment to help you along the way.
Photography Equipment
For the demonstrations in this post, I used a variety of my equipment to capture the final images. I am sharing the different equipment I used for the final images below:
- NIKON D750
- 105mm 2.8
- 24-70mm 2.8
- TRIPOD
- MY OVERHEAD SETUP
- TWO STROBES
- SOFTBOXES
- POCKET WIZARDS
- FOAM BOARDS
- TETHER CABLES
- LIGHTROOM
Don’t worry if you don’t have all of this equipment. You can also practice food photography using your smartphone camera and natural light from a window. In fact, that’s exactly how I got started in food photography and I have a post that shares iPhone Photography Tips that you might find helpful.
Ready to dive into the demonstrations!? Let’s do it!
Food Photography Demonstration: Garlic
For the first demonstration, I used the following materials:
- WHITE FOAM BOARD
- SIMPLE WHITE PLATE
- GARLIC CLOVES
I wanted to create a monochrome image focusing on white so the image would be bright and fresh. I used two strobes with soft boxes on each side of the image. This helped me create even light that was soft without causing harsh shadows. I took quick cell pictures of each of the materials to demonstrate how people might normally see these things and then created the final image.
—
READ MORE ABOUT: MY CURRENT GEAR FOR FOOD PHOTOGRAPHY


Drink Photography Demonstration: Fake Bourbon
For the second demonstration, I used the following materials:
- YELLOW FOAM BOARD
- PRETTY GLASSWARE
- FAKE ICE
- FAKE BOURBON (maple syrup and water)
For the fake bourbon, I mixed maple syrup and water to create the look of bourbon. I think it looks pretty real. I did this, because I wanted to save the real bourbon for sipping… not shooting. Good call, right? 😉
For the final image, I wanted it to be bright and colorful. The yellow foam board was a perfect compliment to the amber color of the “bourbon.”
I only used one light for this shot. Instead of creating a softer light, I wanted to create a direct, sunlight look with stronger shadows. To do this, I removed the soft box from my strobe and completely exposed the bulb. I adjusted the position of my light to hit the glassware in a way that produced stronger shadows. Then, I added a white V-flat opposite the light to bounce light back to the image. This helped the far side from becoming too dark and helped create a more evenly lit image.
Below are some pictures of how people might normally see the materials, as well as my behind the scenes setup for how I shot the final image.
—
READ MORE ABOUT: GETTING STARTED WITH ARTIFICIAL LIGHTING


Food Photography Demonstration: Tomato Soup
For the third experiment, I used the following materials:
- WOOD BOARD
- TARNISHED BAKING SHEET
- BLACK SOUP BOWL
- DARK BROWN SCARF
- CHERRY TOMATOES ON THE VINE
- CANNED TOMATO SOUP
I decided to go with a more dark and moody look for the soup image using a dark wood board, a tarnished baking sheet, a black bowl and a dark brown scarf. Using dark surfaces and props is a good way to experiment with a dark and moody look in your food photography.
I took some pictures of the materials and a behind the scenes setup for how I shot the final image.
—
READ MORE ABOUT: ARTIFICIAL LIGHTING FOR FOOD PHOTOGRAPHY


Food Photography Demonstration: Cherries
For the fourth experiment, I used the following materials:
- BOARD FROM TEXTURIT (USE CODE: REGANBARONI10 FOR 10% OFF YOUR ORDER)
- WHITE WOOD BOARD FROM ERICKSON SURFACES
- PINK BOWL
- WHITE FRAYED LINEN
- CHERRIES
This setup uses natural light only. I wanted to create a light image, but with some depth. I adjusted my camera settings to help me achieve this. I used more neutral props and boards so the colors of the cherries would really pop and get your attention. The pink bowl tied in nicely with the subtle pinks in the background board and the frayed linen added some texture to the scene. I styled the stems to be going different directions in an effort to create more visual interest.
I shot the materials and a behind the scenes image to show you how I shot the final image.
—
READ MORE ABOUT: DARK AND MOODY FOOD PHOTOGRAPHY TIPS


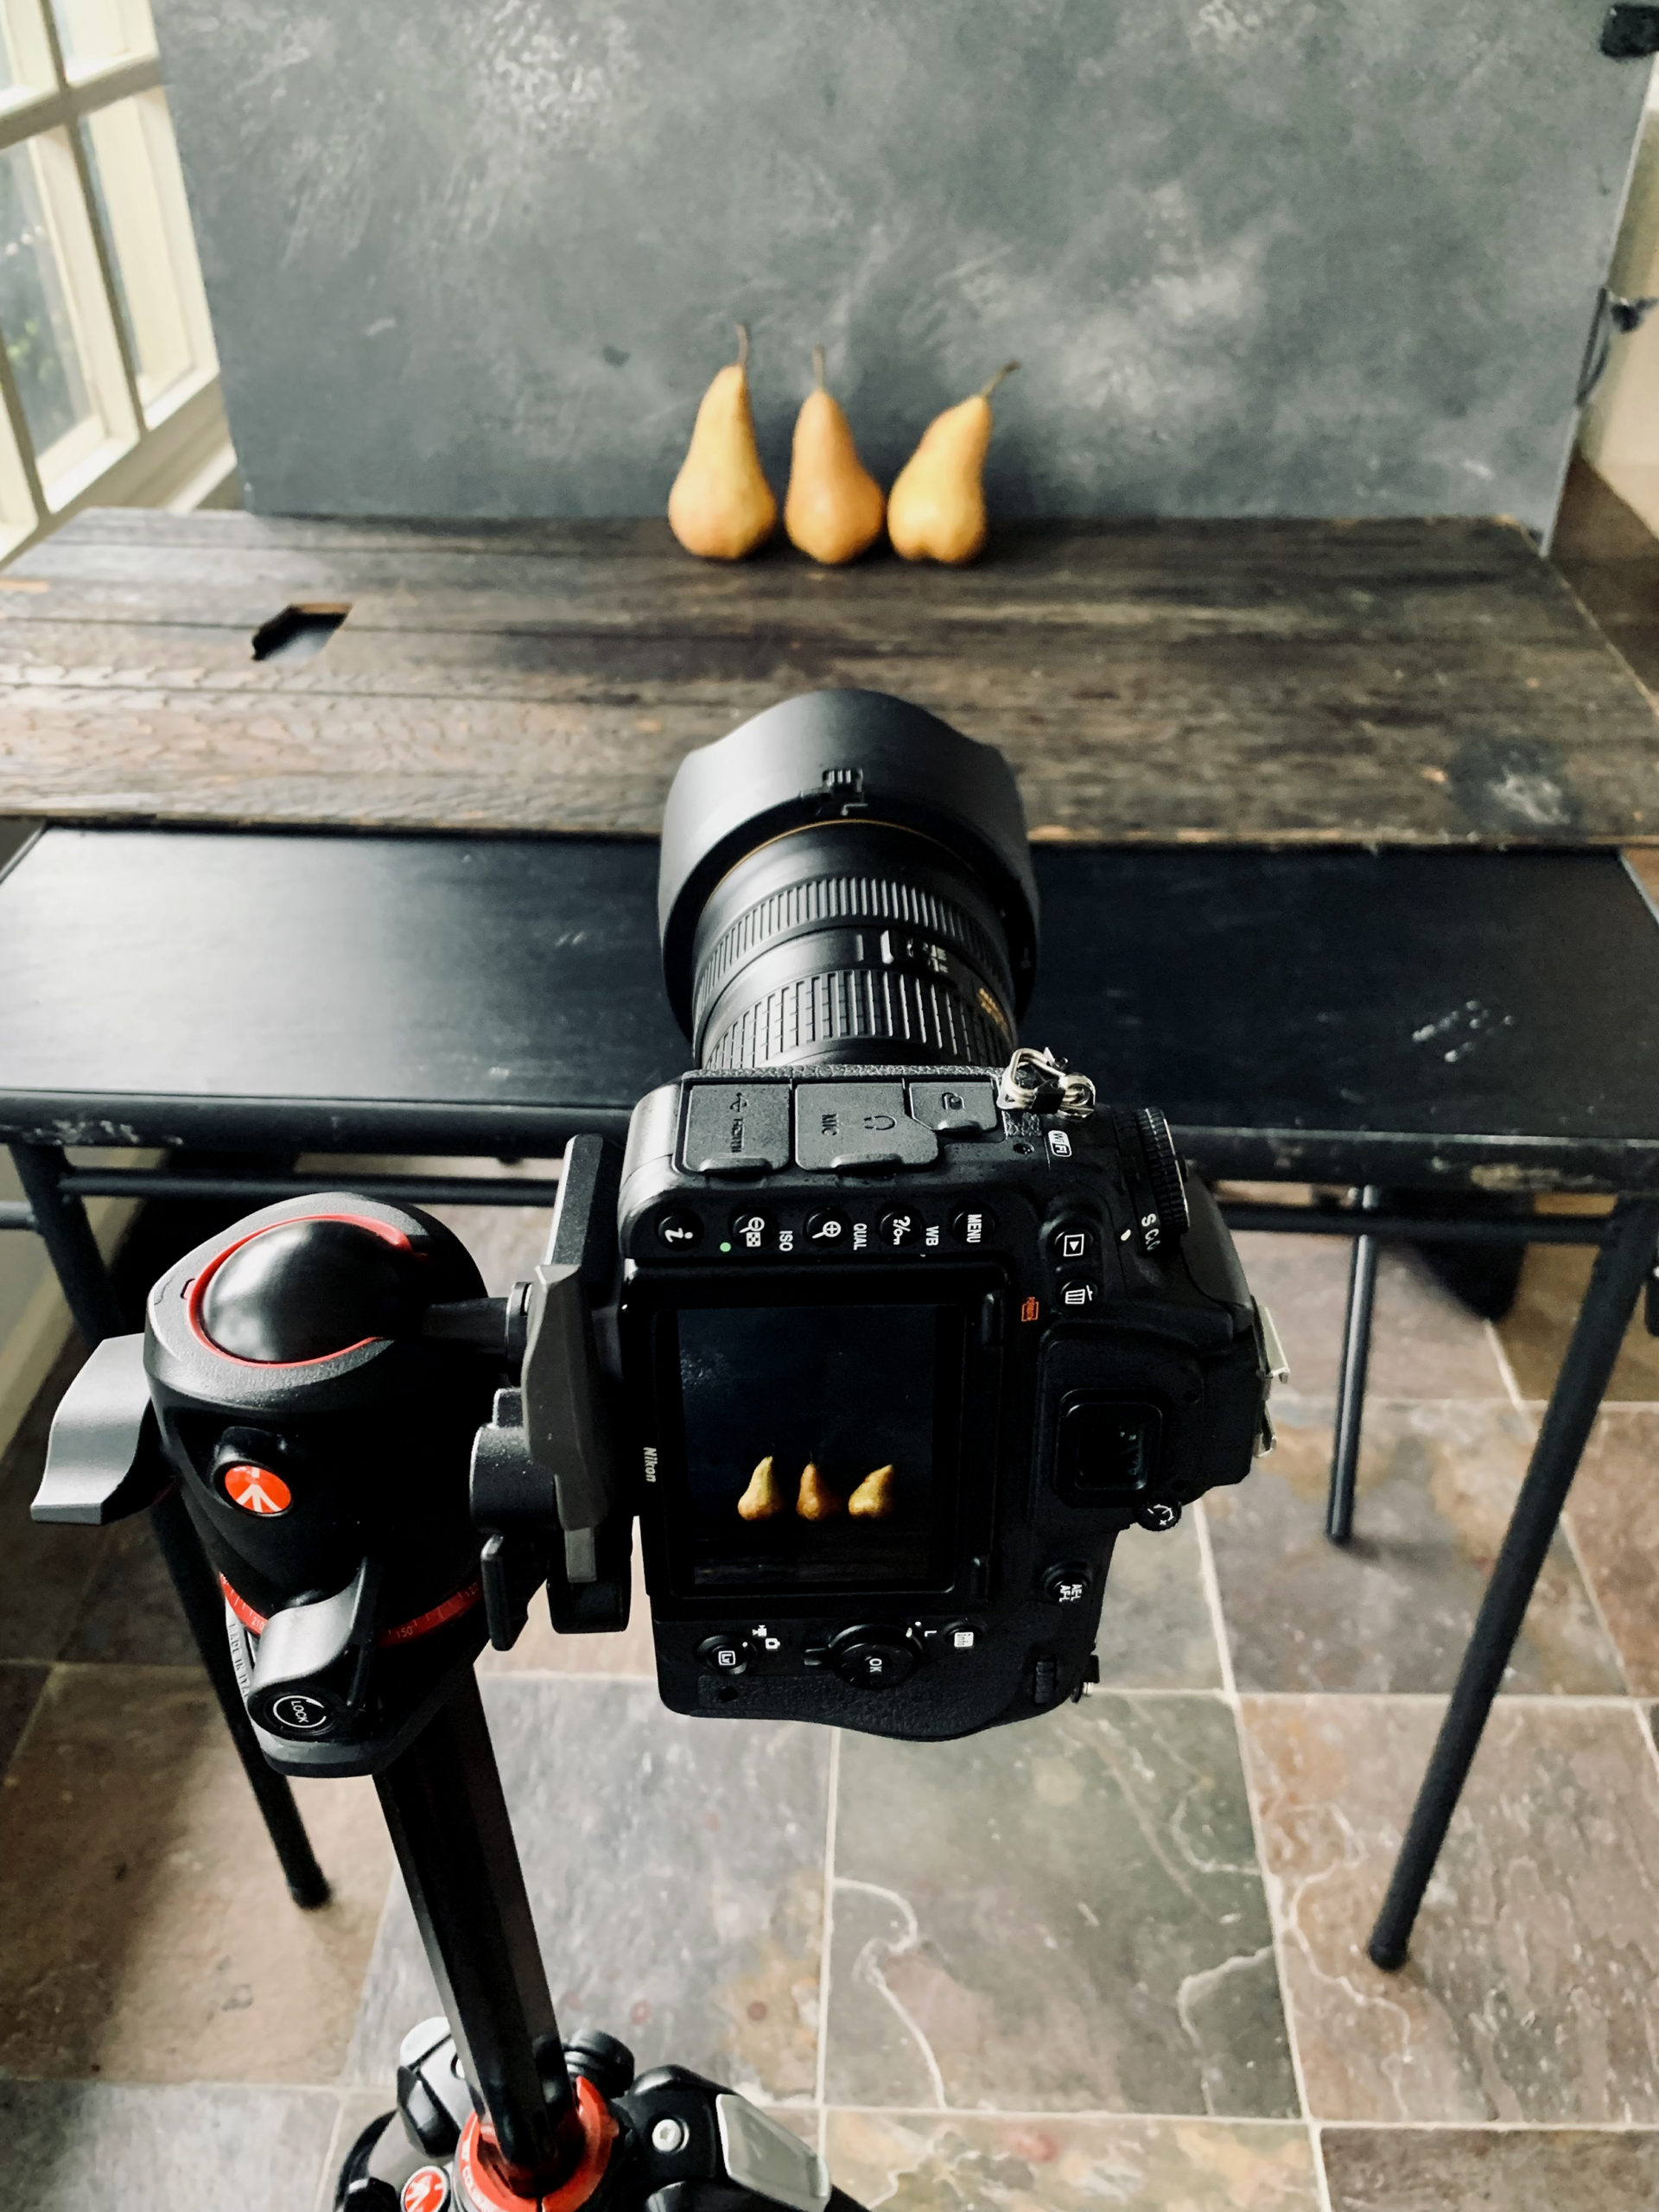
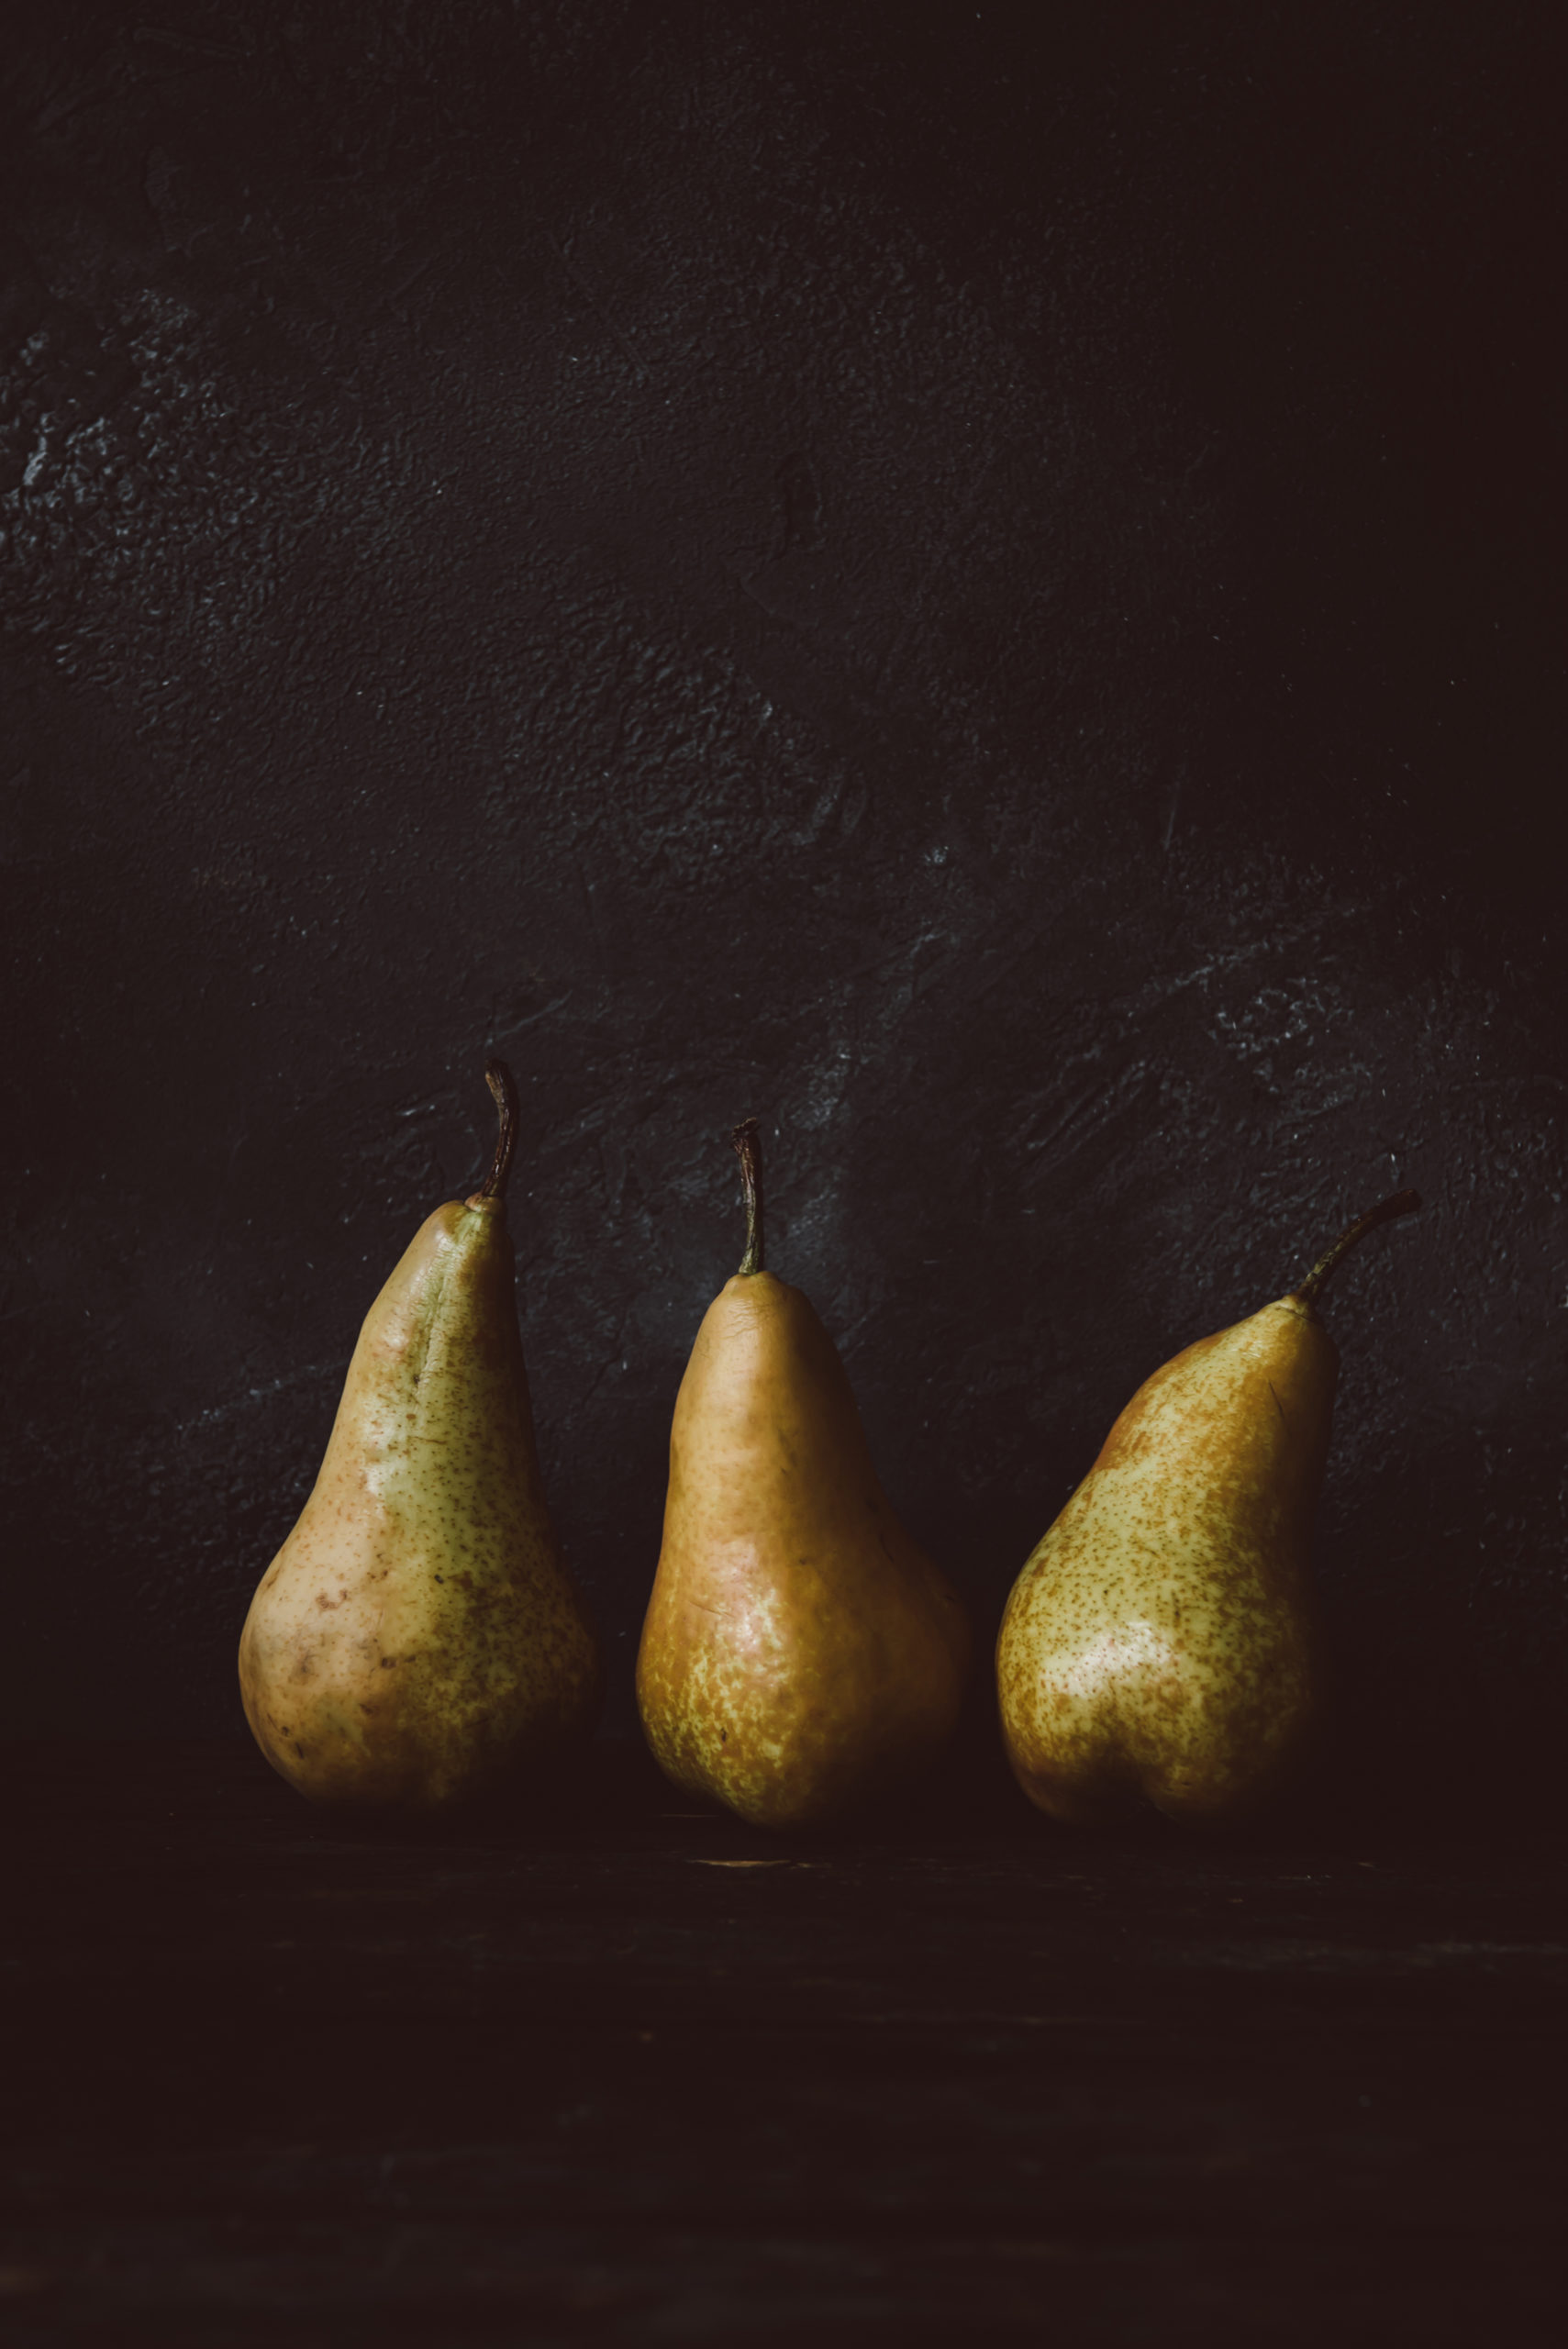
Food Photography: Pears
For the final demonstration, I used the following materials:
- GRAY BOARD FROM TEXTURIT (USE CODE: REGANBARONI10 FOR 10% OFF YOUR ORDER)
- DARK WOOD BOARD
- THREE PEARS
I decided to shoot another dark and moody image, but this time used natural light only. My camera settings helped me achieve a more dark and moody look. The two boards were dark gray and dark brown. I didn’t use any props, because the pears looked so artistic on their own. I took pictures of the materials I used and a behind the scenes image of how I shot the final image.
—
READ MORE ABOUT: NATURAL LIGHT FOOD PHOTOGRAPHY TIPS


I hope this post demonstrated that there is a process behind food photography. It’s never a quick “point and shoot” experience. And, while there is a technical side to photography, don’t get hung up on the gear right now. Use the camera you have and just start practicing.
I can’t wait to see what you do! Reach out with questions anytime!
Happy Shooting!
—
This post contains affiliate links which means if you click or make a purchase through my site, I might make a small commission at no extra cost to you. I only promote products that I actually use and support.
—
All images ©Regan Baroni 2020.
I LOVE this post Regan!!! It’s positive, educational and inspiring. Improvising to create is one of the foundations of great art, and you’ve achieved it here!
Thank you so much, Mark!
What a creative, artistic individual you are! It has been so much fun watching the progress of your interests, skills, and career.
Awwww, thank you so much! xo
Simple yet beautiful!! no words to explain the beauty of the clicks!! Thanks for this inspiring post! Really motivating.
Thank you so much for this sweet comment! I’m so glad you enjoyed this post!